
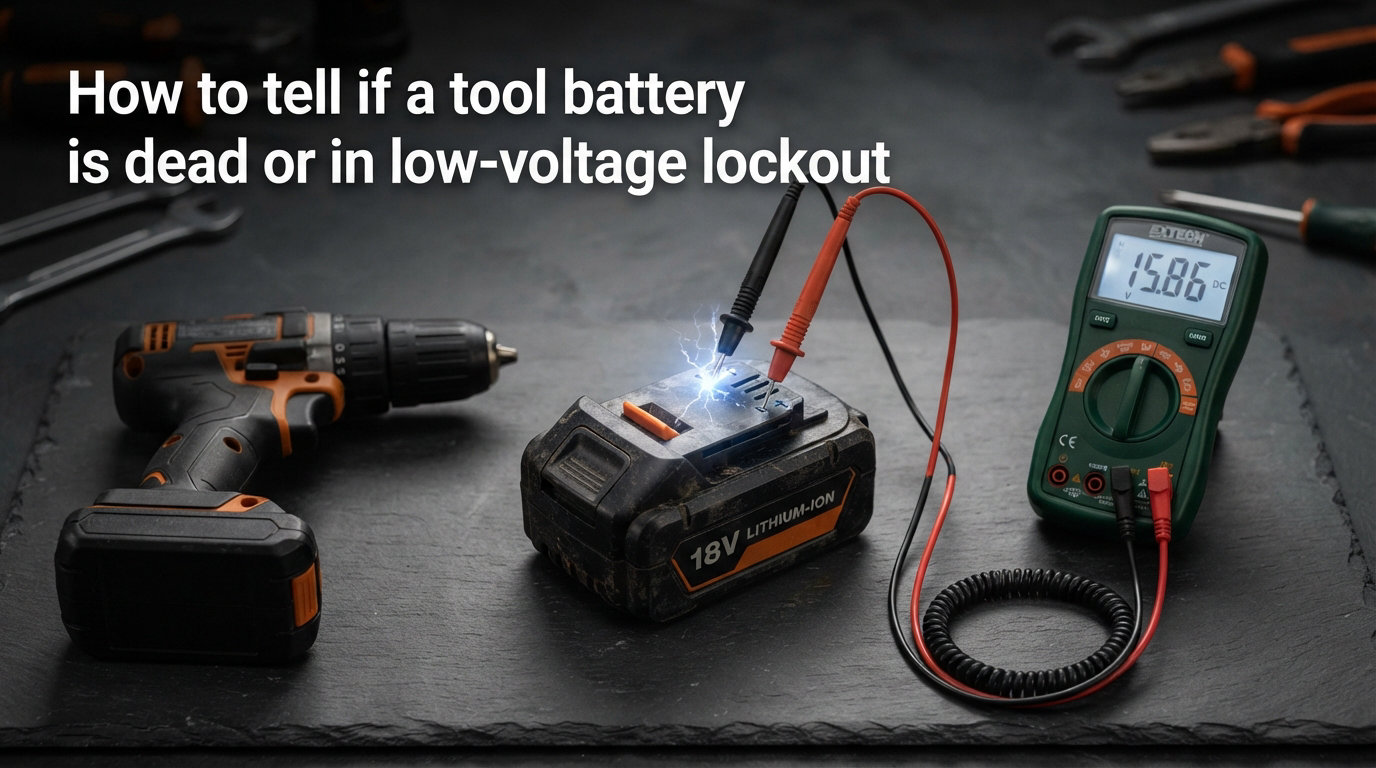
You pull the trigger on your cordless drill and nothing happens. The battery sat in your garage for a few months, and now you are staring at a silent tool wondering what went wrong. Before you toss that pack in the recycling bin, you need to know how to tell if a tool battery is dead or in low-voltage lockout.
Low-voltage lockout (LVL) is a built-in protection feature that shuts down a lithium-ion battery pack before it suffers permanent cell damage. A truly dead battery has suffered irreversible chemical or physical failure. The difference matters because a locked-out battery can often be recovered, while a dead one needs replacement.
This guide walks you through the exact diagnostic process I use when troubleshooting power tool batteries. You will learn the visual warning signs, the multimeter testing procedure with brand-specific voltage thresholds, and the recovery methods that can bring a locked-out pack back to life. By the end, you will have saved yourself the cost of an unnecessary replacement.
Table of Contents
What Is Low-Voltage Lockout on a Tool Battery?
Low-voltage lockout is a protection feature in lithium-ion batteries that disconnects the output when cell voltage drops below a safe threshold. Think of it as an emergency shutoff valve. The battery is not broken when this happens. It has simply refused to operate in a state that would cause permanent damage to the cells.
Inside every modern cordless tool battery, a battery management system (BMS) watches over the individual cells. The BMS is a small circuit board that monitors voltage, temperature, and current. When any single cell falls below the minimum safe voltage, typically between 2.5 and 3.0 volts per cell, the BMS opens a high-side MOSFET. That MOSFET is an electronic switch that cuts off the power flow from the cells to the tool terminals.
To the user, the battery suddenly appears completely dead. The tool will not run, and the fuel gauge lights may not even illuminate. But internally, the cells still hold a partial charge and remain chemically intact. The pack has entered a protective sleep state, not a state of failure.
Key Terms to Understand
Battery Management System (BMS): The circuit board inside the pack that monitors cells and controls protection features. Every reputable lithium-ion power tool battery has one.
Undervoltage Lockout (UVLO): The technical term for the cutoff mechanism. Some manufacturers call it low-voltage cutoff (LVC). Both refer to the same protection event.
Cutoff Voltage: The specific voltage level at which the BMS disconnects the pack. This threshold varies by brand and pack configuration, which I cover in detail later.
Over-Discharge Protection: The broader safety category that includes low-voltage lockout. Lithium-ion cells permanently degrade if discharged below roughly 2.5 volts per cell, so the BMS prevents this from happening.
Forum discussions from communities like r/MilwaukeeTool confirm how this works in practice. Users report that Milwaukee M18 batteries monitor each of the five cell groups individually. The pack cuts off whenever any single group drops below the minimum, not when the overall pack average hits the threshold. This per-cell monitoring is why one weak cell can trigger lockout even when the rest of the pack has capacity left.
Dead Battery vs Low-Voltage Lockout: The Core Difference
The core difference between a dead battery and one in low-voltage lockout comes down to recoverability. A locked-out battery has intact cells that the BMS has deliberately disconnected to protect them. A dead battery has suffered irreversible damage through cell degradation, internal shorting, or physical failure. Knowing which situation you face determines whether you spend ten minutes on recovery or fifty dollars on a replacement.
Here is a side-by-side comparison of the symptoms for each state:
Voltage reading: Lockout typically reads between 30% and 80% of nominal voltage. Dead reads near zero volts or fluctuates wildly.
Fuel gauge behavior: Lockout may show no lights or a single blinking light. A dead pack often shows no lights at all and will not respond to the gauge button under any condition.
Charger response: A locked-out battery usually gets recognized by the charger after a recovery attempt. A dead battery may cause the charger to flash an error code or refuse to engage entirely.
Physical condition: Lockout packs look normal. Dead packs may show swelling, leaking, cracked casing, or burn marks on the terminals.
Recovery potential: Lockout is almost always recoverable with the right method. True cell death is permanent.
Signs Your Battery Is in Low-Voltage Lockout
The most common sign of low-voltage lockout is a battery that worked fine before storage but now refuses to power the tool or charge normally. You set it aside at the end of a project with some charge remaining, and weeks later it acts completely dead.
Other reliable indicators include the fuel gauge lights going dark even though you know the pack was not fully depleted, the tool sputtering briefly before shutting off completely during use, and a charger that flashes a recovery or error light rather than a steady charging indicator. Many tool users on Reddit describe this exact scenario. The battery showed full charge on the gauge, ran for a minute, then died and would not respond.
A multimeter reading between roughly 12 and 16 volts on an 18-volt nominal pack strongly suggests lockout rather than death. The BMS has disconnected the main output, but a residual or partial voltage may still register on the terminals depending on the circuit design.
Signs Your Battery Is Truly Dead
A truly dead battery shows signs of irreversible failure. The most obvious is physical damage to the pack. If the casing is swollen, bulging, cracked, or hot to the touch without being on a charger, the cells have failed and the pack is dangerous to use.
A multimeter reading of zero volts, or a reading that drops to zero the moment you apply any load, indicates that cells have internally shorted or the BMS itself has failed permanently. A pack that reads correct voltage but delivers almost no current, shutting off the tool instantly under any real load, has degraded cells that can no longer hold meaningful capacity.
Leaking electrolyte, corrosion on the terminals, or a burnt smell coming from the pack are all signals of permanent failure. None of these conditions can be fixed with recovery techniques. The battery needs replacement.
How to Test a Tool Battery with a Multimeter
Testing a tool battery with a multimeter is the fastest and most reliable way to distinguish between lockout and death. A multimeter gives you hard voltage numbers instead of guesswork. You only need a basic digital multimeter, which costs under twenty dollars at any hardware store.
Step-by-Step Multimeter Testing Procedure
Follow these steps in order to get an accurate reading of your battery pack.
Step 1: Set up your multimeter. Turn the dial to DC voltage mode. Select a range that covers your pack voltage, usually the 20-volt or 200-volt DC setting. Plug the red probe into the voltage jack and the black probe into the common jack.
Step 2: Identify the terminals. Look at the battery contacts. You need the positive and negative output terminals, not the small data communication contacts. On most packs, the large terminals are the power outputs and the small ones are for the tool-to-battery communication.
Step 3: Measure open-circuit voltage. Touch the red probe to the positive terminal and the black probe to the negative terminal. Hold steady for three to five seconds and record the reading. This is your open-circuit voltage with no load applied.
Step 4: Compare to the threshold table. Match your reading to the brand-specific cutoff voltages in the next section. A reading well below the nominal voltage but above zero points toward lockout. A reading at or near zero points toward a dead pack or failed BMS.
Step 5: Perform a load test. Connect the battery to the tool and pull the trigger while simultaneously measuring voltage across the terminals. A healthy pack holds voltage under load. A locked-out or failing pack will show voltage that collapses immediately when load is applied.
Step 6: Check individual cells if possible. For advanced diagnosis, opening the pack and measuring each cell group individually reveals which cells have dropped low. This step is only for users comfortable with electronics work. Always disconnect and let the pack rest before opening any battery casing.
Interpreting Voltage Readings
Understanding what the numbers mean is just as important as taking the measurement. Here is how to interpret different voltage readings on an 18-volt nominal (20-volt max) lithium-ion pack.
A fully charged 5-cell-series pack reads around 20 to 21 volts open-circuit. This is the maximum charge voltage of roughly 4.2 volts per cell multiplied by five cells. The tool runs at full power in this range.
A pack reading between 16 and 18 volts is partially discharged but healthy. This is the normal operating range during use. The BMS allows discharge down to the cutoff threshold during normal operation.
A reading between 12 and 15 volts suggests the pack has been deeply discharged and may be in or near lockout. This is the recovery zone. The cells are low but not permanently damaged if they have not sat this way for too long.
A reading below 10 volts, or a reading of zero, indicates either a failed BMS or permanently damaged cells. Recovery is unlikely at this point. One important note from forum users: a battery can read acceptable voltage on a multimeter but still fail under load. The open-circuit voltage only tells part of the story. Always confirm with a load test if the first reading looks normal but the tool still will not run.
Brand-Specific Voltage Cutoffs for Power Tool Batteries
Each manufacturer sets its own cutoff threshold based on their BMS design and cell chemistry. Knowing your brand’s specific numbers helps you interpret multimeter readings accurately. The values below reflect community-tested data and manufacturer specifications gathered from forums and technical documentation.
Dewalt 20V Max (18V nominal, 5-cell series): The fuel gauge goes dark and the pack stops delivering power at approximately 15.3 volts. This aligns with a per-cell cutoff of roughly 3.0 volts. Reddit users in r/Dewalt have confirmed this threshold through direct testing.
Milwaukee M18 (18V nominal, 5-cell series): Milwaukee’s BMS monitors each of the five cell groups individually and triggers cutoff when any single group drops below the minimum. The effective pack cutoff sits around 15 volts, though the per-cell monitoring means a single weak cell can trigger lockout earlier.
Makita LXT 18V (5-cell series): Makita’s cutoff threshold is similar to the industry standard, landing around 15 volts at the pack level. The LXT BMS also incorporates temperature monitoring that can trigger protective shutdown in addition to voltage-based lockout.
Ridgid 18V (5-cell series): Ridgid packs follow the same general cutoff range of approximately 15 volts. Some Ridgid tools also have the low-voltage cutoff built into the tool rather than the battery, which is an important distinction. The tool itself may shut down before the battery BMS triggers.
Higher-voltage packs (36V, 40V, 60V, 80V): These use more cells in series. A 40V max pack (10-cell series) has a cutoff around 30 volts. An 80V max pack (20-cell series) cuts off near 60 volts. The per-cell rule of 3.0 volts minimum holds across all configurations.
Per-Cell Minimum Voltages
The universal rule for lithium-ion cells is that they should never be discharged below 2.5 volts per cell. Most tool manufacturers set their BMS cutoff slightly higher, at 2.7 to 3.0 volts per cell, to provide a safety margin. To find your pack’s approximate cutoff, multiply 3.0 volts by the number of cells in series.
For a standard 5-cell-series pack, that gives 15 volts. For a 10-cell-series pack, that gives 30 volts. This simple calculation works across all brands because the underlying lithium-ion chemistry is the same regardless of the label on the pack.
Cells that drop below 2.5 volts begin to dissolve the copper current collector inside the cell. Once that happens, the cell is permanently damaged and will not recover even if recharged. This is why the BMS is so aggressive about cutting off power before cells reach this danger zone.
How to Recover a Battery from Low-Voltage Lockout?
Recovering a battery from low-voltage lockout means getting enough voltage back into the pack for the BMS to wake up and accept a normal charge. The protection circuit needs to see a minimum voltage on its power input before it will close the MOSFET and allow current to flow. You are essentially jump-starting the management system.
Method 1: The Charger Reset
The simplest recovery method is to place the battery on its dedicated charger and wait. Some chargers have a recovery mode that applies a low current to slowly bring the pack above the lockout threshold. Leave the pack on the charger for up to thirty minutes. If the charging light comes on solid, recovery is working. If the charger flashes an error or does nothing after several attempts, move to the next method.
Method 2: Jumpstart with a Charged Pack
You can jumpstart a locked-out pack using a fully charged battery of the same voltage. Use jumper wires with alligator clips to momentarily connect the positive terminal of the charged pack to the positive terminal of the locked-out pack, and negative to negative. Hold the connection for five to ten seconds.
This brief contact pushes enough current into the locked-out pack to raise its voltage above the BMS wake-up threshold. Immediately place the recovered pack on its charger to complete a normal charge cycle.
Safety warning: Never leave the jumper wires connected for more than a few seconds. Sustained connection without current limiting can cause overheating or cell damage. If you see any swelling, heat, or sparking, disconnect immediately.
Method 3: Bench Power Supply
For users with a variable DC power supply, this is the most controlled recovery method. Set the power supply to the pack’s nominal voltage, such as 18 volts for a 5-cell pack. Set a current limit of 0.5 amps to keep the charge rate safe. Connect positive to positive and negative to negative.
Let the supply run for ten to fifteen minutes. This slowly raises the cell voltage above the lockout threshold. Once the pack reads above 15 volts on a multimeter, transfer it to its regular charger to finish the full charge cycle.
When to Replace vs Attempt Recovery
Attempt recovery if the pack reads between 10 and 15 volts, shows no physical damage, and has been in storage for weeks or months rather than years. These packs almost always respond to one of the three methods above.
Replace the pack if it reads zero volts after multiple recovery attempts, shows physical swelling or damage, smells burnt, or reads acceptable voltage but collapses instantly under any load. These symptoms indicate cell-level failure that no recovery method can fix.
Also replace any pack that is more than five years old and has been deeply discharged for an extended period. Even if you get it to charge, the cells will have lost significant capacity and will not hold a useful charge for long.
Diagnostic Flowchart: Lockout or Dead?
Use this step-by-step diagnostic flowchart to work through the problem systematically. Each step builds on the previous one.
Step 1: Inspect the battery physically. If you see swelling, cracks, leaks, or burn marks, the pack is dead. Replace it. Do not attempt recovery on a physically damaged pack.
Step 2: Press the fuel gauge button. If the lights come on at all, even dimly, the BMS still has power and the cells have some charge. This points toward lockout rather than death. Proceed to Step 3.
Step 3: Connect the battery to the tool and pull the trigger. If the tool runs briefly then dies, or sputters and stops, the pack is likely in or near lockout. If nothing happens at all, proceed to Step 4.
Step 4: Test the open-circuit voltage with a multimeter. A reading between 10 and 15 volts on an 18-volt pack indicates lockout. A reading near zero indicates death or a failed BMS.
Step 5: If voltage looks acceptable, perform a load test by running the tool while measuring. If voltage collapses to near zero under load, the cells are degraded and the pack is effectively dead.
Step 6: If the diagnosis points to lockout, attempt recovery using the charger reset, jumpstart, or bench power supply methods. If recovery succeeds, the pack is back in service. If recovery fails after all three methods, the cells are too far gone and replacement is necessary.
FAQs
Is my battery bad or just dead?
A bad battery has suffered irreversible cell damage and cannot be recovered. A dead or discharged battery, including one in low-voltage lockout, can often be brought back with a recovery charge. Test with a multimeter first. A reading between 10 and 15 volts on an 18-volt pack suggests the cells are intact and recovery is possible.
At what voltage is a battery considered dead?
A lithium-ion cell is considered permanently dead below 2.5 volts per cell. For a 5-cell-series 18-volt pack, that means below 12.5 volts total. Most tool manufacturers set their low-voltage lockout cutoff higher, at roughly 15 volts (3.0 volts per cell), to prevent cells from ever reaching the danger zone.
How to tell if a battery has low voltage?
Signs of low voltage include fuel gauge lights going dark, the tool sputtering and dying mid-use, the charger flashing an error instead of charging, and a multimeter reading well below the nominal pack voltage. For an 18-volt pack, any reading below 15 volts suggests the pack is in or approaching low-voltage lockout.
How to wake up a lithium battery?
To wake up a lithium battery from low-voltage lockout, place it on its charger for up to 30 minutes to see if the charger has a recovery mode. If that fails, briefly jumpstart the pack by connecting its terminals to a fully charged battery of the same voltage for 5 to 10 seconds. Alternatively, use a bench power supply set to the pack’s nominal voltage with a 0.5-amp current limit for 10 to 15 minutes.
How to fix low voltage on battery?
Low voltage on a tool battery is fixed by recharging the pack above the lockout threshold. Use a charger with recovery mode, a jumpstart from a charged pack, or a bench power supply. If the battery will not accept any charge after repeated attempts, or shows physical damage, it cannot be fixed and needs replacement.
Can a battery read 12 volts and still be dead?
Yes. A battery can show acceptable open-circuit voltage on a multimeter but still be functionally dead. This happens when the cells are degraded and cannot deliver current under load. To confirm, perform a load test by running the tool while measuring voltage. If the reading collapses to near zero when the tool draws power, the cells are dead even though the resting voltage looked fine.
How to test a tool battery with a multimeter?
Set your multimeter to DC voltage, touch the red probe to the positive terminal and the black probe to the negative terminal, and hold for several seconds. Compare the reading to the nominal pack voltage and the brand-specific cutoff threshold. A healthy 18-volt pack reads 18 to 21 volts when charged. A reading below 15 volts suggests low-voltage lockout, and near zero indicates a dead pack.
Wrapping Up: Diagnosing Dead vs Locked-Out Batteries
Learning how to tell if a tool battery is dead or in low-voltage lockout saves you money and frustration. The diagnostic process is straightforward: inspect for physical damage, check the fuel gauge, run the tool, measure voltage with a multimeter, and perform a load test. Each step narrows down the diagnosis until you know exactly what you are dealing with.
Remember that low-voltage lockout is a protective feature, not a failure. Most locked-out packs recover with a charger reset, jumpstart, or bench power supply charge. Packs that read near zero volts, show physical damage, or collapse under load are genuinely dead and need replacement. Store your batteries at around 40 to 50 percent charge to prevent lockout from happening in the first place.
Keep a multimeter in your workshop and run through this diagnostic flowchart the next time a battery acts up. You will likely find that most packs you thought were dead are just sleeping and waiting for the right wake-up call.