
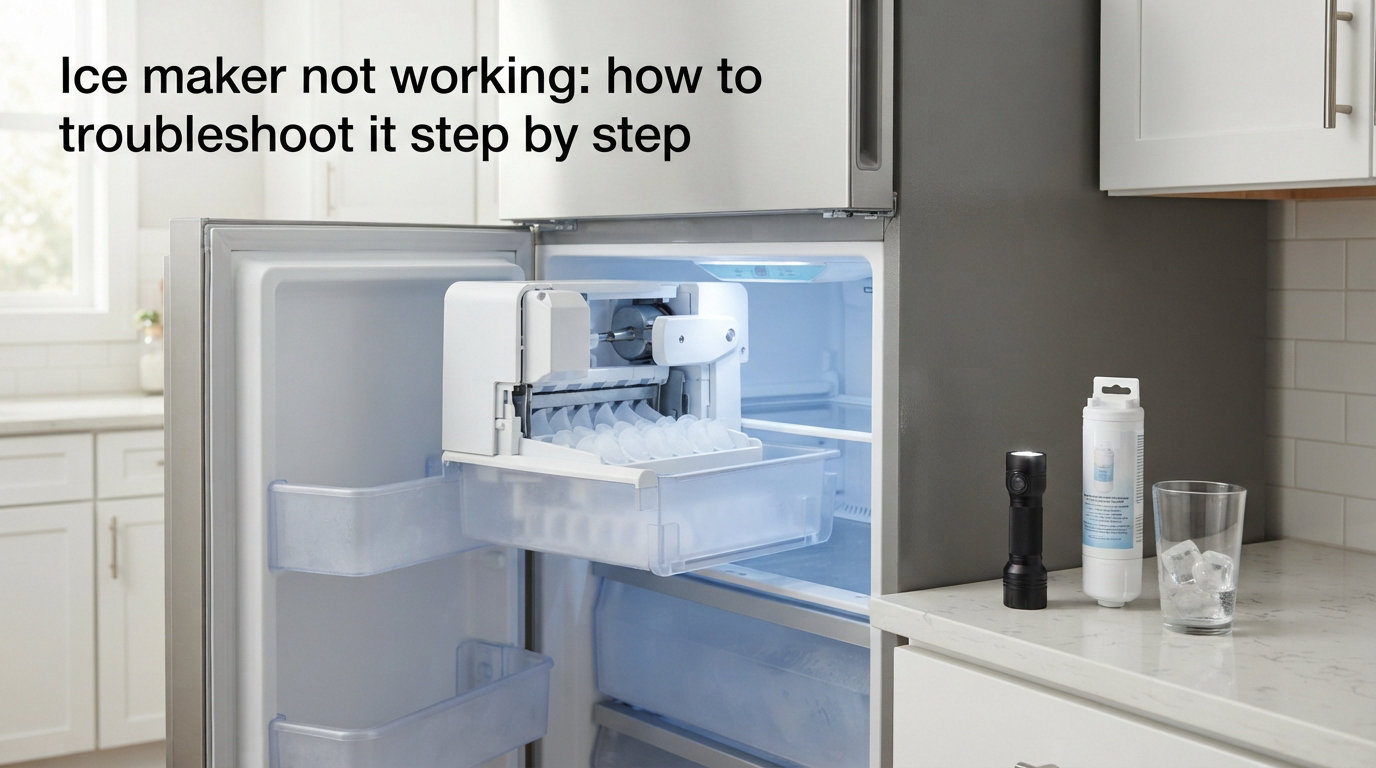
When your refrigerator ice maker suddenly stops producing ice, it throws a wrench into your daily routine. Whether you are hosting guests, filling a cooler, or just wanting cold water, a silent ice maker is frustrating. The good news is that most ice maker problems have straightforward fixes you can handle yourself in under an hour.
This guide covers ice maker not working how to troubleshoot it step by step, from basic power checks all the way through advanced component testing. Our team has pulled together the most common causes reported by homeowners, appliance technicians, and forum communities to build a diagnostic process anyone can follow.
You do not need special tools or technical experience for most of these steps. A screwdriver, a multimeter (for a few advanced checks), and about 30 minutes of patience will get you through the entire troubleshooting sequence. By the end, you will know exactly what is wrong and how to fix it.
Table of Contents
How an Ice Maker Works (The Short Version)
Understanding the basic ice-making cycle helps you pinpoint where things break down. Water enters through a supply line, flows through a fill valve, and fills an ice mold inside the freezer. A thermostat detects when the water has frozen solid.
Once frozen, a small heater warms the mold slightly so the cubes release. A motor then sweeps the cubes into the storage bin, and the cycle repeats. A control arm or sensor tells the unit when the bin is full so production stops.
If any link in that chain fails, you get no ice, partial ice, or another symptom. The troubleshooting steps below walk through each potential failure point in order of likelihood. Start at step one and work your way down, since the most common problems are also the easiest to fix.
How to Diagnose an Ice Maker Not Working?
Start your diagnosis by confirming the symptom and checking the simplest causes first. Most ice maker failures fall into one of these categories: no ice at all, small or hollow cubes, slow production, leaking, or no dispensing.
Run through this quick checklist before diving deeper into any single component:
Is the ice maker switched on? Check the on/off toggle or wire arm.
Is the freezer cold enough? It needs to be at 0 to 5 degrees Fahrenheit.
Is the water supply valve behind the fridge fully open?
Has the water filter been replaced in the last 6 months?
Is the ice bin seated correctly so the sensor detects it?
If you answered yes to all of the above and still have no ice, move on to the detailed step-by-step process below. Forum data from appliance repair communities shows that roughly 90 percent of ice maker problems trace back to water supply, filter, or temperature issues, not a broken machine.
Step 1: Check Basic Power and Settings First
Always start with the basics before assuming a mechanical failure. Many ice maker service calls end with the technician flipping a switch the homeowner overlooked.
Verify the Ice Maker Is Turned On
Most refrigerator ice makers have a physical on/off switch or a wire bail arm. If the arm is in the up position, the unit thinks the bin is full and stops making ice. Push the arm down to resume production.
Some models use a digital toggle in the fridge control panel or door display. Check your owner’s manual if you cannot find the switch, since its location varies widely between brands.
Check the Ice Bin Position
The ice bin must sit flush in its slot for the sensor or control arm to register correctly. Pull the bin out, check for stuck cubes or debris underneath, then push it back in firmly until you feel it click into place.
If the bin is even slightly misaligned, the ice maker may think it is full and shut down production entirely. This is one of the most overlooked causes of a sudden ice shortage.
Confirm the Refrigerator Has Power
It sounds obvious, but verify the fridge is running and the freezer is cold. If the freezer is warm, your ice maker will not work regardless of its own condition. Check that the fridge is plugged in and the circuit breaker has not tripped.
Listen for the compressor running. If the freezer feels warm but the fridge section is fine, you may have a defrost system issue that requires professional attention.
Step 2: Inspect the Water Supply and Filter
Water supply problems are the single most common reason an ice maker stops working. If the unit cannot get water, it cannot make ice, no matter how perfectly everything else functions.
Trace the Water Line Behind the Refrigerator
Pull the refrigerator away from the wall carefully and locate the water supply line running from your home plumbing to the fridge. Look for kinks, sharp bends, or crushed sections that restrict flow.
A kinked line is easy to fix. Straighten it out and secure it so it does not get pinched again when you push the fridge back. Leave enough slack so the line is not under tension.
Open the Shut-Off Valve Fully
Find the shut-off valve where the water line connects to your household plumbing, usually under the sink or behind the fridge. Turn it counterclockwise to make sure it is fully open.
Saddle valves, the self-piercing type common in older installations, are notorious for restricting flow and clogging over time. If you have one, consider replacing it with a proper quarter-turn ball valve for better water delivery.
Replace a Clogged Water Filter
A clogged water filter is the number one reported ice maker problem in homeowner forums. Filters trap sediment and minerals, and when they get full, water flow drops to a trickle or stops entirely.
Most manufacturers recommend replacing the filter every 6 months. If yours has been in longer than that, replace it now and see if ice production resumes within 24 hours. This single fix resolves a large percentage of ice maker complaints.
Some refrigerators display a filter indicator light. Even if it has not triggered yet, an old filter can still restrict flow enough to slow or stop ice production.
Check Water Pressure
Your ice maker needs at least 20 psi of water pressure to function properly. If pressure is too low, the fill valve will not open fully and the mold will not fill completely.
Disconnect the water line at the back of the fridge and hold it over a bucket. Briefly open the shut-off valve. Water should flow out steadily and forcefully. A weak trickle indicates a pressure problem that may require a plumber.
Step 3: Verify Freezer Temperature Settings
Ice makers need a sufficiently cold environment to freeze water into cubes. If your freezer is too warm, production slows dramatically or stops completely.
The Ideal Freezer Temperature
Set your freezer to between 0 and 5 degrees Fahrenheit for the best ice production. Anything above 10 degrees Fahrenheit will cause the ice maker to struggle or fail entirely.
Use a standalone appliance thermometer to verify the actual temperature, since built-in displays can be inaccurate. Place the thermometer in the freezer for 24 hours, then check the reading.
Look for Frost Buildup
Excessive frost on the evaporator coils blocks airflow and raises the freezer temperature. If you see frost accumulating on the back interior wall of the freezer, you may have a defrost system problem.
A defrost issue usually involves a failed defrost timer, heater, or thermostat. These components are replaceable, but they require some electrical testing to diagnose accurately.
Check for Airflow Blockage
An overstuffed freezer can block the vents that circulate cold air to the ice maker. Make sure food packages are not pressed against the back wall or covering the air vents near the ice maker housing.
Leave at least an inch of clearance around the ice maker assembly. Cold air needs to flow freely around the mold for efficient freezing.
Condenser Coil Cleaning
Dirty condenser coils force the compressor to work harder and can raise freezer temperatures. Pull the fridge out and vacuum or brush the coils on the back or underneath the unit.
One forum user reported that cleaning the lint-packed coils under the toe kick fixed a recurring freezing issue that had stumped them for months. This simple maintenance step takes 10 minutes and costs nothing.
Step 4: Examine the Water Inlet Valve
The water inlet valve is an electrically controlled valve that opens to fill the ice mold and closes to stop flow. If it fails, the ice maker gets no water or fills continuously.
What the Inlet Valve Does
When the ice maker signals for water, the valve opens for a few seconds, lets water flow into the mold, then closes. This valve requires at least 20 psi of water pressure to seal properly after closing.
If pressure is too low, the valve may not close completely and can leak water continuously into the ice maker, causing overflow or freezing issues.
How to Test the Valve
You can test the inlet valve with a multimeter set to measure resistance. Unplug the refrigerator, locate the valve (usually at the bottom back of the fridge), and disconnect its wires. Measure the resistance across the valve terminals.
A functioning valve typically reads between 500 and 1500 ohms. If the reading is significantly outside that range or shows no continuity at all, the valve needs replacement.
Frozen Inlet Tube
Sometimes the water line where it enters the ice maker freezes solid, blocking flow even when the valve works fine. Look for ice buildup in the fill tube that runs from the valve up to the ice maker.
A common DIY fix is to use a hair dryer on a low setting to gently thaw the frozen section. Hold it 6 to 8 inches away and keep it moving so you do not melt any plastic components.
If the tube freezes repeatedly, the inlet valve may be seeping water slowly, which freezes over time. In that case, replacing the valve is the permanent solution.
Replacing the Inlet Valve
Replacement inlet valves are widely available and typically cost between 20 and 60 dollars. Unplug the fridge, shut off the water supply, disconnect the old valve, and install the new one in the same orientation.
Most homeowners can handle this replacement in under 30 minutes with a wrench and a screwdriver. Match the part number from your old valve or look it up by refrigerator model number.
Step 5: Reset the Ice Maker
Sometimes an ice maker simply needs a reset to clear a stuck cycle or electronic glitch. Forum data shows that resetting by cutting power for 5 minutes resolves many intermittent issues.
The Power-Cycle Reset Method
Unplug the refrigerator from the wall outlet or flip the circuit breaker that powers it. Wait a full 5 minutes to let all capacitors drain and the ice maker module fully reset, then restore power.
Listen for the ice maker to cycle after power returns. You should hear the motor sweep or the valve click within 10 to 15 minutes. If nothing happens, try the brand-specific reset below.
Whirlpool and KitchenAid Reset
Many Whirlpool and KitchenAid ice makers have a reset button or a test switch. Locate the small button on the front or bottom of the ice maker module, press and hold it for about 10 seconds, then release.
The unit should run a test cycle that ejects any cubes in the mold and refills with water. If it does not respond, the module itself may have failed.
For models without a button, manually raising the bail arm to the off position, waiting 30 seconds, and lowering it back down can trigger a reset on some units.
Samsung Reset
Samsung refrigerators with French door designs often have the ice maker reset built into the control panel. Press and hold the Ice Maker button on the front display for about 10 seconds until you hear a chime.
On some Samsung models, you can force a harvest cycle by pressing the test button located on the front of the ice maker assembly. Hold it for 3 to 8 seconds and listen for the motor to activate.
LG Reset
LG refrigerators typically reset the ice maker through the door control panel. Press and hold the Ice Plus or Freezer button for 3 to 5 seconds, depending on your model, until the display confirms the reset.
Some LG ice makers also have a physical test button on the unit itself. Check your manual for the exact location and procedure for your specific model year.
Portable Ice Maker Reset
Portable and countertop ice makers usually reset by simply turning the unit off and unplugging it for 10 minutes. Drain any standing water, then plug it back in and power it on. The control board restarts fresh.
Other Common Ice Maker Problems and Fixes
Beyond a total failure to make ice, several other symptoms point to specific issues. Here are quick fixes for the most common complaints.
Ice Maker Not Dispensing Ice
If your ice maker produces ice but it will not come out the door dispenser, the auger motor or dispenser solenoid is likely the culprit. The auger is the spiral mechanism that pushes ice forward when you press the lever.
Remove the ice bin and check for clumped or fused cubes blocking the auger. Break up any clumps and clear the dispensing chute. If the motor does not turn when activated, test it with a multimeter and replace if faulty.
A frozen auger motor can also cause this problem. Check for ice buildup around the motor housing and thaw it with a hair dryer if needed.
Small or Hollow Ice Cubes
Small, thin, or hollow cubes indicate insufficient water reaching the mold. This almost always traces back to low water pressure, a clogged filter, or a partially closed supply valve.
Start by replacing the water filter if it is more than 6 months old. Then check the water pressure at the supply line. If both are fine, the inlet valve may be failing and opening only partially, which means replacement.
Ice Maker Leaking Water
A leaking ice maker can cause puddles under or inside the refrigerator. The most common cause is a loose or cracked water line connection at the back of the fridge.
Inspect all connections and tighten them by hand. Replace any visibly cracked tubing. If the leak comes from inside the freezer compartment, the fill cup or ice mold may be cracked and need replacement.
A defective inlet valve that does not fully close can also cause continuous leaking. If water keeps dripping even after the mold is full, replace the valve.
Ice Has an Odd Taste or Smell
Bad-tasting ice usually comes from an old water filter, stale ice sitting in the bin too long, or food odors transferring through the freezer. Replace the filter first, then discard all old ice and let the unit produce a fresh batch.
Store ice in a sealed container if it sits unused for long periods. An open bin absorbs freezer odors quickly, especially near strongly scented foods.
If the taste persists after a filter change, clean the ice bin and the interior of the freezer with a baking soda and water solution. This removes residue that can transfer flavors.
Ice Maker Producing Too Much Ice
When ice overflows the bin, the control arm or bucket sensor is likely stuck or broken. The arm should rise as ice piles up and trigger a shutoff. If it is jammed in the down position, the unit keeps making ice indefinitely.
Check that the arm moves freely. If it is bent or frozen in place, straighten it or thaw the mechanism. A failed sensor may require replacement of the bail arm assembly.
Portable and Countertop Ice Maker Troubleshooting
Portable and countertop ice makers operate differently from built-in refrigerator units, and they have their own set of common problems. Since these are a frequently underserved topic in troubleshooting guides, let us cover the basics.
Portable Ice Maker Not Making Ice
If your portable ice maker runs but produces no ice, check the water reservoir first. The sensor that detects low water can stick, so the unit thinks it is empty even when it is not. Empty the reservoir, clean the sensor area, and refill with fresh water.
Check the ambient temperature around the unit. Most portable ice makers struggle in rooms above 90 degrees Fahrenheit. Move the unit to a cooler spot if the room is hot.
Error Codes on Portable Units
Many portable ice makers display error codes when something goes wrong. An E1 or “add water” error means the reservoir is empty or the water sensor failed. An E2 or “ice full” error means the basket sensor detects ice even when empty.
Clean both sensors with a soft cloth and mild cleaner. If the codes persist, the sensor may need replacement, which is often more cost-effective than replacing the entire unit.
Cleaning Cycle
Run a cleaning cycle on your portable ice maker every 3 to 6 months. Use a mixture of water and white vinegar or a manufacturer-approved descaling solution. Scale buildup from hard water reduces efficiency and shortens the unit’s lifespan.
Brand-Specific Troubleshooting Notes
Different refrigerator brands have known quirks worth knowing about. Here are the most commonly reported brand-specific issues from repair forums.
Whirlpool Ice Maker Issues
Whirlpool refrigerators commonly experience ice maker failures related to the optical sensor system used to detect ice levels. If the emitter and receiver boards on either side of the bin fail, the ice maker stops entirely.
You can test the sensor by placing a glass between the two sensor modules. If the LED behavior changes, the system is working. If nothing changes, one of the boards may need replacement.
Whirlpool modular ice makers, identifiable by the plastic cover on the front of the unit, are also prone to module failures. The module controls timing and motor operation, and when it fails, the unit stops mid-cycle.
Samsung Ice Maker Issues
Samsung French door refrigerators have a well-documented history of ice maker freezing and jamming problems. The ice buildup often occurs around the ice bucket and auger assembly.
A common fix involves forcing a defrost cycle. Some models allow you to activate a forced defrost through a button combination on the control panel. Check your manual for the specific sequence, as it varies by model.
Samsung has issued service bulletins and extended coverage for certain models. If your unit is affected, contact Samsung support to ask about warranty extensions or authorized service options before paying for repairs.
LG Ice Maker Issues
LG refrigerators with the ice maker in the door are prone to frozen water lines. The exposed fill tube can freeze in colder climates or if the freezer temperature is set too low.
Thaw the fill tube using a hair dryer, then verify the freezer temperature is set to 0 degrees Fahrenheit, not colder. Excessively cold settings can actually cause condensation that refreezes and blocks the line.
Some LG models have a recalled ice maker assembly. Check the LG website with your model and serial number to see if your unit qualifies for a free repair.
When to Call a Professional (and What It Costs)
Most ice maker problems are fixable with the steps above, but some situations call for a professional technician. Knowing when to stop and call for help saves you time and prevents further damage.
Signs You Need a Pro
Call a professional if you have replaced the filter, checked water pressure, tested the inlet valve, reset the unit, and still have no ice after 24 hours. At that point, the problem likely involves the ice maker module, control board, or a sealed system component.
Also call if you see unusual frost patterns, hear grinding or buzzing sounds from the compressor, or notice the freezer cannot maintain temperature. These point to bigger refrigeration issues beyond the ice maker.
Typical Repair Costs
A standard appliance repair service call runs between 100 and 200 dollars for the visit, plus parts and labor. Total ice maker repairs typically fall between 150 and 350 dollars depending on the part and your location.
For comparison, a replacement ice maker assembly costs 80 to 150 dollars if you install it yourself. If the diagnosis points to a failed module and you are comfortable with basic repairs, DIY replacement can save you the service call fee.
If your refrigerator is more than 10 years old and the repair estimate exceeds 300 dollars, it may make more sense to replace the entire refrigerator rather than sink money into an aging unit.
Seasonal Maintenance Tips to Prevent Ice Maker Problems
A little preventative maintenance goes a long way toward keeping your ice maker running year-round. These seasonal habits address the most common failure points before they become real problems.
Replace the Filter on Schedule
Mark your calendar to replace the water filter every 6 months. This single habit prevents the majority of low-flow and no-ice issues. Many modern refrigerators even have an automatic filter reminder that syncs to an app.
Winter and Cold Weather Tips
If your refrigerator sits in a garage or unheated space, cold weather can freeze water lines and damage the inlet valve. Consider insulating the water supply line with foam pipe insulation during winter months.
In extreme cold, the refrigerator’s thermostat can behave unpredictably, causing the freezer to run too cold or too warm. Monitor the temperature closely with an appliance thermometer during cold snaps.
Monthly Bin Cleaning
Empty and wash the ice bin monthly with warm soapy water. This removes mineral deposits, bacteria, and absorbed odors that degrade ice quality. Dry it completely before returning it to the freezer.
Also wipe down the ice maker assembly and surrounding area. A clean environment reduces the chance of sensor malfunctions and stuck components.
FAQs
How to diagnose an ice maker not working?
Start by checking the on/off switch, bail arm position, and freezer temperature. Then inspect the water supply line for kinks, confirm the shut-off valve is fully open, and replace the water filter if it is over 6 months old. If those check out, test the water inlet valve with a multimeter and reset the ice maker by cutting power for 5 minutes. Work through each step systematically since 90 percent of failures trace to water supply or temperature issues.
What is the most common problem with ice makers?
A clogged water filter is the single most common ice maker problem reported by homeowners and technicians. Filters trap sediment and minerals over time, and when they get full, water flow drops dramatically or stops entirely. Replacing a filter older than 6 months restores flow and resolves a large percentage of ice maker complaints.
How do I manually reset my ice maker?
Unplug the refrigerator or flip the circuit breaker, wait 5 full minutes, then restore power. The ice maker module resets and should cycle within 10 to 15 minutes. For models with a reset button, press and hold it for 10 seconds to trigger a test cycle. Samsung and LG units also offer reset options through the door control panel by holding the Ice Maker or Freezer button.
How to get an ice maker to start working again?
Check that the bail arm is down and the bin is seated correctly. Verify the freezer is at 0 to 5 degrees Fahrenheit, replace the water filter, and confirm the supply valve behind the fridge is fully open. Reset the unit by cutting power for 5 minutes. If no ice appears within 24 hours after these steps, test the water inlet valve and check for a frozen fill tube.
What are the common reasons why an ice maker is not making ice?
The most common causes are a clogged water filter, kinked or frozen water line, closed or partially open shut-off valve, freezer temperature above 10 degrees Fahrenheit, a failed water inlet valve, or a stuck control arm. Less common causes include a broken ice maker module, faulty optical sensors, or low water pressure below 20 psi. Start with the simplest checks first.
Why is my ice maker making ice but not dispensing ice?
The auger motor or dispenser solenoid is likely the culprit. Remove the ice bin and check for clumped cubes blocking the auger or dispensing chute. Break up any fused ice and clear the path. If the motor does not turn when you press the dispenser lever, test it with a multimeter and replace it if it shows no continuity. A frozen auger motor can also cause this, so check for ice buildup around the motor housing.
Conclusion
A broken ice maker is almost always fixable without a service call, and this guide on ice maker not working how to troubleshoot it step by step covers every major failure point. Start with the power switch and bail arm, then move through water supply, filter, temperature, inlet valve, and reset procedures in that order.
The vast majority of problems come down to a clogged filter, restricted water line, or freezer that is too warm. Fixing these basic issues costs little and takes under an hour. Replace your filter every 6 months, keep the freezer at 0 to 5 degrees Fahrenheit, and clean the bin monthly to prevent future failures.
If you have worked through all five steps and still have no ice after 24 hours, the inlet valve or ice maker module is the likely culprit. At that point, either order a replacement part and install it yourself or call a professional. Either way, you now know exactly what the problem is and what it should cost to fix.