
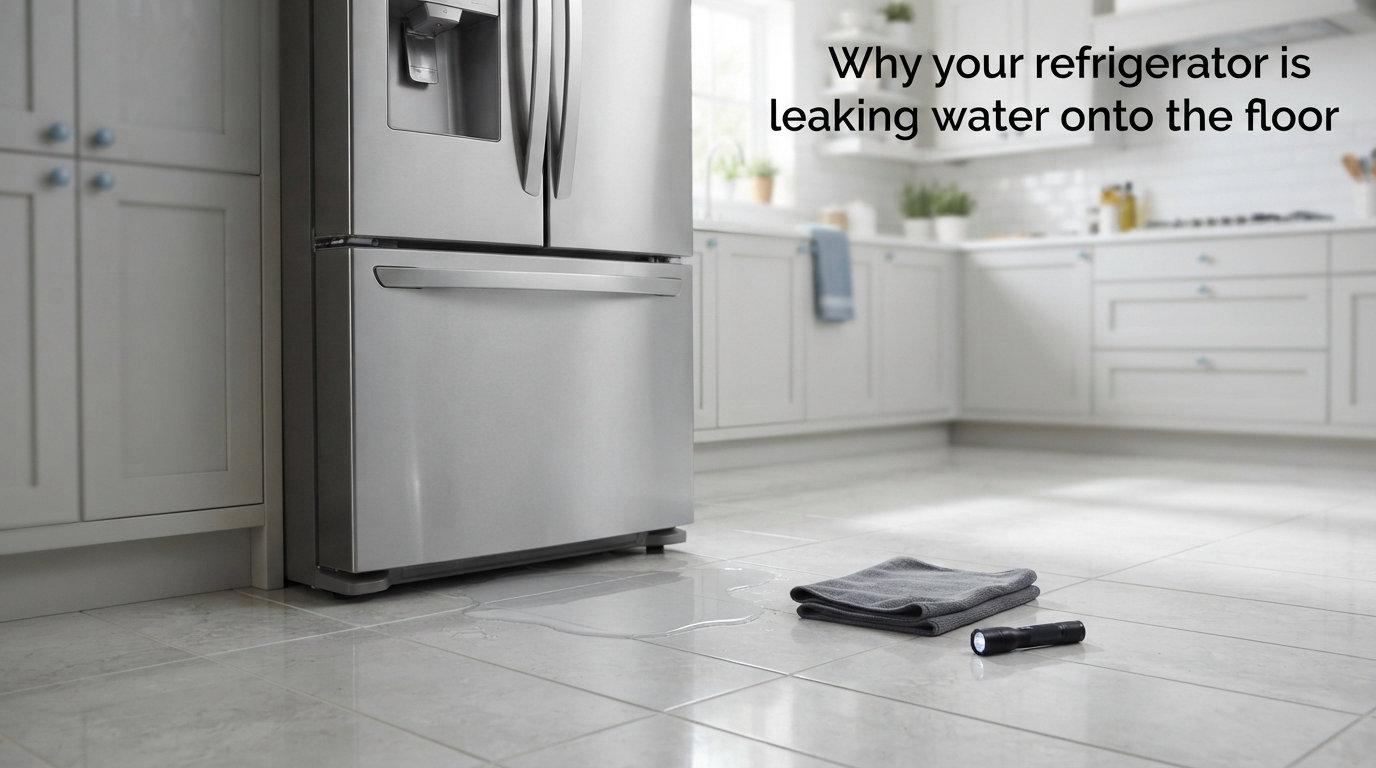
Finding a puddle under your refrigerator is one of those household moments that immediately triggers a sense of dread. You start wondering whether you are looking at a minor fix or a major repair bill, and the longer that water sits on your floor, the more damage it can do to your cabinetry, subfloor, and walls.
The good news is that a refrigerator leaking water onto the floor is usually caused by one of a handful of fixable problems. In most cases, you can diagnose and repair the issue yourself in under an hour with basic household tools. Our team has helped homeowners troubleshoot this exact problem dozens of times, and the solutions tend to follow a predictable pattern.
This guide walks you through every common cause, gives you a simple diagnostic process to identify your specific issue, and provides step-by-step fix instructions for each scenario. We will also cover when you should stop and call a professional, what it might cost, and how to prevent the problem from coming back.
Whether you are dealing with a slow drip or a full puddle, a brand-new fridge or a ten-year-old unit, the information below will help you take action confidently. Let us start with the fastest way to figure out what is actually going on.
Table of Contents
Quick Diagnosis: Which Component Is Causing Your Leak?
The fastest way to solve this problem is to narrow down where the water is coming from before you start taking anything apart. Most leaks originate from one of three systems inside your refrigerator, and the location of the water tells you a lot about which one is to blame.
If water is pooling inside the refrigerator compartment (usually under the crisper drawers) and then spilling out onto the floor, your defrost drain is almost certainly clogged. This is the single most common cause of refrigerator leaks, accounting for the majority of cases we see.
If water is appearing directly under the back of the fridge and the inside of the refrigerator is completely dry, check your water supply line connection. This is the plastic or copper tube that runs from your wall to the back of the fridge, and it can crack, loosen, or freeze.
If water is pooling under the front of the fridge near the base, your drain pan may be cracked, overflowing, or missing entirely. This shallow plastic tray sits underneath the compressor and catches condensation that drips down from the defrost system.
If water is running down the inside of the door or pooling near the front edge of the shelves, your door seal (gasket) is likely failing and allowing warm, humid kitchen air to enter. The condensation from that warm air creates water droplets that eventually find their way to the floor.
Take two minutes to look at where the water is collecting. That single observation will save you time and point you directly to the right section below.
Why Your Refrigerator Is Leaking Water Onto the Floor: Common Causes
A refrigerator leaking water onto the floor can trace its root cause back to one of these eight issues. Here is the full list, ranked roughly by how frequently each one occurs:
Clogged defrost drain — debris or ice blocks the drain hole, sending defrost water onto your floor
Water supply line problem — loose fitting, cracked tube, or frozen line feeding the ice maker or water dispenser
Cracked or overflowing drain pan — the collection tray under the fridge is damaged or too full
Damaged door seal or gasket — warm air enters, creates condensation, and produces excess water
Freezer ice buildup — ice dams block drainage and force water out through the freezer compartment
Improper leveling — the fridge tilts forward, causing water to run toward the door instead of the drain
High humidity — seasonal moisture overwhelms the defrost system’s capacity
Defrost system failure — a broken defrost timer, heater, or thermostat causes excessive ice and water
We will walk through each one in detail below, starting with the most common culprit.
Clogged Defrost Drain: The Number One Cause
A clogged defrost drain is the most frequent reason your refrigerator is leaking water onto the floor. Every frost-free refrigerator goes through automatic defrost cycles, typically two to four times a day, where a heater melts frost off the evaporator coils. That melted water flows through a small drain hole at the bottom of the freezer or refrigerator compartment, travels down a drain tube, and empties into the drain pan under the fridge.
When that drain hole gets blocked by food particles, ice, grease, or mineral deposits, the water has nowhere to go. It pools inside the fridge compartment, usually under the crisper drawers, and eventually spills out the front door onto your kitchen floor.
You will know you have a clogged defrost drain if you see water pooling inside the refrigerator, particularly in the bottom back corner. The puddle may freeze and re-melt, creating a cycle of ice and water.
How to Unclog a Defrost Drain: Step by Step
Unclogging a defrost drain is one of the easiest DIY refrigerator repairs you can do. Here is the process that works for most models:
Step 1: Unplug the refrigerator. Safety comes first. Pull the fridge away from the wall and disconnect the power cord before you do anything else. Shut off the water supply valve if your fridge has a water line.
Step 2: Locate the drain hole. On most refrigerators, the defrost drain opening is on the floor of the freezer compartment, near the back wall. You may need to remove the rear interior panel of the freezer (usually held by a few screws) to access it. On some French-door models, the drain is in the back of the main refrigerator compartment behind the crisper drawers.
Step 3: Clear visible debris. Use a pipe cleaner, a flexible wire, or a zip tie to gently poke through the drain hole. You will often feel resistance where the clog is, and a push should break it loose. Remove any food particles, ice chunks, or gunk you find.
Step 4: Flush with warm water. Fill a turkey baster with warm (not boiling) water and squirt it directly into the drain hole. Repeat several times until the water flows freely through the tube and into the drain pan underneath the fridge. This is the same method Reddit users in r/appliancerepair recommend time and again.
Step 5: Check for ice blockage. If the drain is frozen solid and warm water alone is not clearing it, the ice is deeper in the tube. Pour a small amount of warm water into the drain opening and let it sit for five minutes to melt the ice, then flush again. Some homeowners use a piece of solid copper wire inserted into the drain to conduct heat and prevent future freezing.
Step 6: Clean the drain pan. While you have access, check the drain pan underneath the fridge. Empty any standing water, wipe it clean, and inspect for cracks before sliding the fridge back into place.
This entire process takes about 30 to 45 minutes and requires no special tools beyond a screwdriver, a turkey baster, and a pipe cleaner. If the clog returns within a few weeks, you may have an underlying defrost system issue that needs professional attention.
Water Supply Line Issues
If your refrigerator has an ice maker or water dispenser, it connects to your home’s water supply through a thin tube that runs from a wall valve to the back of the fridge. Problems with this supply line are the second most common cause of a refrigerator leaking water onto the floor.
The connection point where the supply line meets the refrigerator is a frequent trouble spot. The compression fitting can loosen over time from vibration, causing a slow drip that pools behind and under the fridge. You may not notice it until water has already spread across your floor.
Checking and Fixing Your Water Supply Line
Pull the refrigerator away from the wall and inspect the entire length of the supply line, from the wall valve to the fridge connection. Look for drips, cracks, kinks, or bulging. Run your hand along the tube to feel for moisture.
If you find a loose fitting at the connection point, tighten it gently with an adjustable wrench. Do not overtighten, as that can crack the fitting or strip the threads. If the tube itself is cracked or damaged, replace it with a new supply line. Braided stainless steel lines cost a few dollars and are far more durable than plastic ones.
If the supply line is frozen (common in winter months when the line runs through an exterior wall or an unheated crawl space), you will need to thaw it. Use a hair dryer on low heat along the frozen section, or wrap the line with heat tape rated for plumbing use. Insulating the line with foam pipe insulation prevents the problem from recurring.
Check the shut-off valve at the wall as well. A valve that does not fully close or has a worn washer can produce a constant slow drip. If the valve is corroded or leaking from the stem, replace it with a new quarter-turn ball valve for reliable shutoff.
Drain Pan Problems
The drain pan, also called a drip pan or defrost pan, sits underneath the refrigerator near the compressor. It catches the water that drains from the defrost cycle, and the heat from the compressor naturally evaporates that water over time. When something goes wrong with this pan, water ends up on your floor.
The most common drain pan issue is a crack. These pans are typically made of thin plastic that becomes brittle over years of heat exposure from the compressor. A hairline crack can leak slowly enough that you do not notice it until water has spread under your cabinets.
To check your drain pan, unplug the fridge and carefully pull it forward or tilt it back (never lay a refrigerator flat). Locate the pan, usually at the base near the back. Slide it out and inspect it under good lighting for any cracks or splits. If you find damage, order a replacement pan specific to your refrigerator model from the manufacturer or a parts supplier.
An overflowing drain pan is another possibility. If the pan is full of water, the defrost system may be producing more water than it can evaporate. This can happen if the defrost cycle runs too frequently, the compressor is not generating enough heat to evaporate the water, or the pan is simply misaligned and not sitting directly under the drain tube outlet.
Remove the pan, empty it, clean it with warm soapy water, and reinstall it carefully to ensure it sits directly beneath the drain tube. If it overflows again within a day or two, your defrost system may be cycling too often, which warrants a professional inspection.
Damaged Door Seal or Gasket
The rubber gasket around your refrigerator door creates an airtight seal that keeps cold air in and warm, humid air out. When that seal fails, warm kitchen air enters the fridge, hits cold interior surfaces, and condenses into water. Over time, that condensation builds up and drips down to the floor.
A failing door seal is easy to diagnose with the dollar bill test. Close the refrigerator door on a dollar bill (or any piece of paper) so half is inside and half is outside. Slowly pull the bill out. You should feel consistent resistance along the entire length of the seal. If the bill slides freely in some spots, the gasket is not making contact there.
Repeat this test along all four sides of the door. Pay special attention to the bottom of the gasket, where crumbs, spills, and sticky residue accumulate and break the seal.
Fixing a Door Gasket
Sometimes the gasket is simply dirty. Clean it thoroughly with warm soapy water and a soft cloth, removing all debris from the folds and grooves. A buildup of grime can prevent the rubber from sealing properly even when the gasket itself is in good condition.
If the gasket is torn, stretched, warped, or hardened, it needs replacement. Measure your existing gasket or look up your refrigerator model number (usually found on a label inside the fridge compartment) to order the correct replacement. Installation typically involves peeling off the old gasket and pressing the new one into the retaining channel, though some models use screws. The whole job takes about 20 minutes.
A poorly sealing door also forces your compressor to work harder, which raises your energy bill and shortens the life of your refrigerator. Replacing a worn gasket pays for itself quickly.
Freezer Leaks and Ice Buildup
When the freezer is the source of your leak, the culprit is usually ice buildup that blocks the defrost drain or forces water out through gaps in the freezer compartment. This is a different problem from a simple clogged drain because the root cause is excessive ice formation in the first place.
One Reddit user in r/homeowners reported finding 10 to 12 inches of solid ice in the bottom of their freezer, with water leaking out onto the floor. That kind of buildup points to a defrost system that has stopped working entirely. The defrost heater, defrost thermostat, or defrost timer (or control board on newer models) has failed, allowing frost to accumulate unchecked on the evaporator coils.
If you notice your freezer working harder than usual, food developing frost on the surface, or ice creeping up the back wall, check the defrost system. You can test the defrost heater for continuity with a multimeter. If the heater reads open (no continuity), it needs replacement. A defrost thermostat that fails to close at the correct temperature will also prevent the heater from turning on.
Some brands are more prone to this issue than others. Samsung French-door refrigerators are frequently mentioned in appliance repair forums for defrost drain freezing problems, often requiring a drain clip or heat probe modification to keep the drain from icing over. LG models can develop similar issues, particularly in the ice maker compartment where a small drain can freeze and send water cascading into the freezer below.
If you are dealing with a recurring ice problem after clearing the drain, look into a drain heat probe (a small brass clip with a wire that conducts heat from the defrost heater into the drain opening). This inexpensive part, typically under $15, prevents ice from reforming in the drain tube.
Refrigerator Leveling Issues
Believe it or not, a refrigerator that is not level can cause water to pool on your floor. Refrigerators are designed to drain toward the back, where the drain hole connects to the defrost tube. If the fridge tilts forward even slightly, water from the defrost cycle flows toward the front of the compartment and out the door seal instead of down the drain.
Checking your refrigerator’s level is simple. Place a level on top of the fridge, front to back and side to side. The refrigerator should be perfectly level side to side, but it should tilt very slightly backward (about a quarter inch over the full depth) so the doors close on their own and water drains properly.
To adjust the level, locate the leveling legs at the front bottom corners of the fridge. Most have adjustable screw feet that you can turn by hand or with a wrench. Screw the front legs out to raise the front (which tilts the fridge backward) or in to lower it. Check with the level again after each adjustment.
If your floor is uneven (common in older homes), you may need to use shims under the leveling legs to achieve proper tilt. This five-minute fix has resolved leaks for many homeowners who were convinced they had a major mechanical problem.
High Humidity and Seasonal Factors
Environmental conditions play a bigger role in refrigerator leaks than most people realize. During periods of high humidity, particularly in summer or in humid climates, your refrigerator works harder to maintain temperature. Every time you open the door, a large volume of warm, moisture-laden air rushes in, and the defrost system has to deal with all that condensation.
If the defrost system is already working near capacity, high humidity can push it over the edge. You may notice more condensation inside the fridge, water droplets on containers, and small puddles under the crisper drawers. Minimizing door openings, keeping the fridge well-stocked (cold food helps maintain temperature), and making sure the door seal is in good condition all help manage humidity loads.
Winter brings the opposite problem. In cold climates, the water supply line running through an exterior wall or unheated space can freeze solid. A frozen supply line does not just stop water flow to your ice maker; as the ice expands, it can crack the line or push connections apart, causing a flood when the ice eventually thaws. This is a common complaint in regions with harsh winters and was flagged repeatedly in DIY and home maintenance forums.
If you live in a cold climate, insulate your water supply line with foam pipe insulation and consider installing a heat cable if the line passes through a particularly cold area. Also make sure the water line is not routed along an exterior wall if you can avoid it.
How to Prevent Refrigerator Leaks?
Most refrigerator leaks are preventable with basic maintenance. Here is a practical prevention routine that takes less than an hour per year and can save you from costly water damage repairs.
Monthly: Check the floor around your refrigerator for any signs of moisture. Catching a slow leak early prevents floor damage and mold growth. Wipe down the door gasket with warm soapy water to keep it clean and flexible.
Every 3 months: Inspect the water supply line connection behind the fridge. Look for any moisture, drips, or corrosion at the fitting. Tighten loose connections by hand.
Every 6 months: Clean the defrost drain opening. Flush it with warm water using a turkey baster to clear early-stage buildup before it becomes a full clog. Check the drain pan underneath for cracks and clean out any debris or standing water.
Annually: Vacuum the condenser coils on the back or bottom of the fridge. Dusty coils make the compressor run hotter and longer, which affects the defrost system’s ability to evaporate drain water efficiently. Pull the fridge out, unplug it, and use a coil brush or vacuum attachment to remove dust buildup.
Seasonally in cold climates: Verify that your water supply line is insulated and has not frozen. Check for ice in the freezer drain area before it has a chance to build up. In humid summer months, reduce door openings and monitor for excess condensation inside the compartment.
Keep your refrigerator owner’s manual handy. It contains model-specific maintenance recommendations and troubleshooting guides that can save you time when something goes wrong.
Water Damage Prevention
A leaking refrigerator does not just waste water. It can warp hardwood floors, rot subflooring, promote mold growth behind and under cabinets, and even damage ceiling drywall if the leak is on an upper floor. The damage often goes unnoticed until it becomes extensive and expensive to repair.
Place a water leak sensor under or near your refrigerator. These battery-powered devices cost between $15 and $35 and sound an alarm the moment they detect moisture. Some connect to your smartphone and send instant alerts, giving you a heads-up before water has time to spread.
If you have hardwood floors near the refrigerator, consider placing a thin water-resistant mat or tray under the appliance. It will not stop a leak, but it will catch small drips and give you more time to notice the problem. A floor protection pad also makes it easier to slide the fridge in and out for maintenance.
Check the area behind and beside your refrigerator periodically for discoloration, swelling, or a musty smell. These are signs that water has been present long enough to cause structural damage. If you notice any of these warning signs, address the leak immediately and inspect the subfloor and surrounding cabinetry for rot or mold.
Safety Warnings Before You Start
Working on a refrigerator involves both water and electricity, a combination that demands caution. Follow these safety practices every time you perform maintenance or repairs.
Always unplug the refrigerator before removing panels, accessing the drain, or working near any electrical components. Do not rely on the on/off controls inside the fridge. Pull the plug from the wall outlet or shut off the breaker dedicated to that circuit.
Shut off the water supply valve before disconnecting or inspecting the water supply line. The valve is typically located in the wall behind the refrigerator or under the sink. Turning it off prevents a flood if a fitting comes loose while you are working.
Never use boiling water on plastic drain components. Boiling water can warp or crack the drain pan, tube, and interior panels. Stick with warm tap water, which is hot enough to melt ice without damaging parts.
Do not lay the refrigerator flat to access the drain pan or compressor area. Laying a fridge on its back or side can allow compressor oil to flow into the cooling lines, which will permanently damage the appliance. If you need to access the bottom, pull the fridge forward or tilt it back carefully with a helper.
If you smell refrigerant (a sweet, chemical odor) or hear hissing from the cooling system, stop immediately and call a professional. Refrigerant handling requires EPA certification and specialized equipment.
When to Call a Professional?
Many refrigerator leaks are fixable with the DIY methods above, but some problems require a professional technician. Knowing when to stop and call for help can save you from making the problem worse.
Call a professional if you have cleared the defrost drain and the clog returns within a week or two. Recurring clogs indicate a deeper problem with the defrost system that requires diagnostic tools and replacement parts. A technician can test the defrost heater, thermostat, and control board to pinpoint the failing component.
If your water supply line is inside a wall or runs through a finished ceiling and you cannot access the entire length, a plumber is your best option. Attempting to fix a concealed line without proper access can lead to more leaks behind walls where they cause hidden damage.
For any issue involving refrigerant, the sealed cooling system, or the compressor, you need a licensed appliance repair technician. These repairs are not DIY projects and require specialized tools, certifications, and safety equipment.
What Will It Cost?
Understanding typical repair costs helps you decide whether a fix is worth it. Here are the ranges we see for common refrigerator leak repairs:
Defrost drain cleaning (DIY): $0 to $15 (turkey baster, pipe cleaner, warm water)
Drain pan replacement: $25 to $60 for the part, plus $100 to $150 labor if you hire a technician
Water supply line replacement (DIY): $15 to $30 for a braided stainless steel line
Door gasket replacement: $40 to $100 for the part, plus $80 to $150 for labor
Defrost heater or thermostat replacement: $150 to $300 total (parts and labor)
Defrost control board replacement: $200 to $400 total
Compressor replacement: $500 to $1,000 or more (consider replacing the fridge if it is over 8 to 10 years old)
If your refrigerator is more than 10 years old and the repair estimate exceeds half the cost of a new unit, replacing the fridge is usually the smarter financial choice. New models are significantly more energy-efficient, which lowers your electric bill and helps offset the purchase price over time.
FAQs
How to fix a refrigerator that is leaking water on the floor?
Start by identifying where the water is pooling. Water inside the fridge usually means a clogged defrost drain, which you can clear with warm water from a turkey baster and a pipe cleaner. Water directly under the back means a supply line issue, while water under the front points to the drain pan. Follow the diagnostic steps in this guide for your specific symptom.
What does it mean when your refrigerator leaks water from the bottom?
A leak from the bottom typically points to one of three problems: a clogged defrost drain overflowing inside the compartment, a cracked or misaligned drain pan under the fridge, or a loose or damaged water supply line connection. Check the drain pan first since it is the easiest to inspect, then trace the supply line for drips.
How do you unblock a defrost drain in a refrigerator?
Unplug the fridge, locate the drain hole (usually in the back of the freezer floor or behind the crisper drawers), and clear it with a pipe cleaner or flexible wire. Then flush it several times with warm water from a turkey baster until water flows freely into the drain pan below. If the drain is frozen solid, let warm water sit in the opening for five minutes to melt the ice before flushing again.
What kind of fridge leak leaks onto the floor?
Leaks that reach the floor usually come from the defrost drain overflowing inside the compartment, a cracked drain pan, a damaged water supply line, or a failing door gasket producing excess condensation. Internal-only leaks that stay inside the fridge rarely reach the floor, while supply line and drain pan leaks almost always do.
Is a refrigerator leaking water dangerous?
A leaking refrigerator can cause floor damage, mold growth, and electrical hazards. Water pooling near the compressor or electrical components creates a shock risk. If water reaches hardwood or laminate flooring, it can cause warping and rot. Address the leak promptly and place a water leak sensor nearby for early detection.
Why is my new refrigerator leaking water from the bottom?
New refrigerators sometimes leak because they were not properly leveled during installation, causing defrost water to flow toward the front instead of the drain. Check the leveling legs and adjust them so the fridge tilts slightly backward. Also verify that the drain plug was removed during installation and that the water supply line was connected tightly.
Conclusion
A refrigerator leaking water onto the floor is stressful, but it is one of the most solvable household problems you will encounter. The vast majority of leaks trace back to a clogged defrost drain, a supply line issue, or a drain pan problem, all of which you can diagnose with a quick visual check and fix with basic tools.
The key is to act quickly. The longer water sits on your floor, the more damage it does to hardwood, subflooring, and surrounding cabinetry. Run the diagnostic steps in this guide, follow the step-by-step fix for your specific symptom, and put a prevention routine in place so the problem does not return.
If the fix seems beyond your comfort level or the leak persists after your repair, do not hesitate to call a professional. Knowing when to stop is just as important as knowing how to start. With the information in this guide, you now have everything you need to handle a refrigerator leak confidently and protect your kitchen from water damage.