
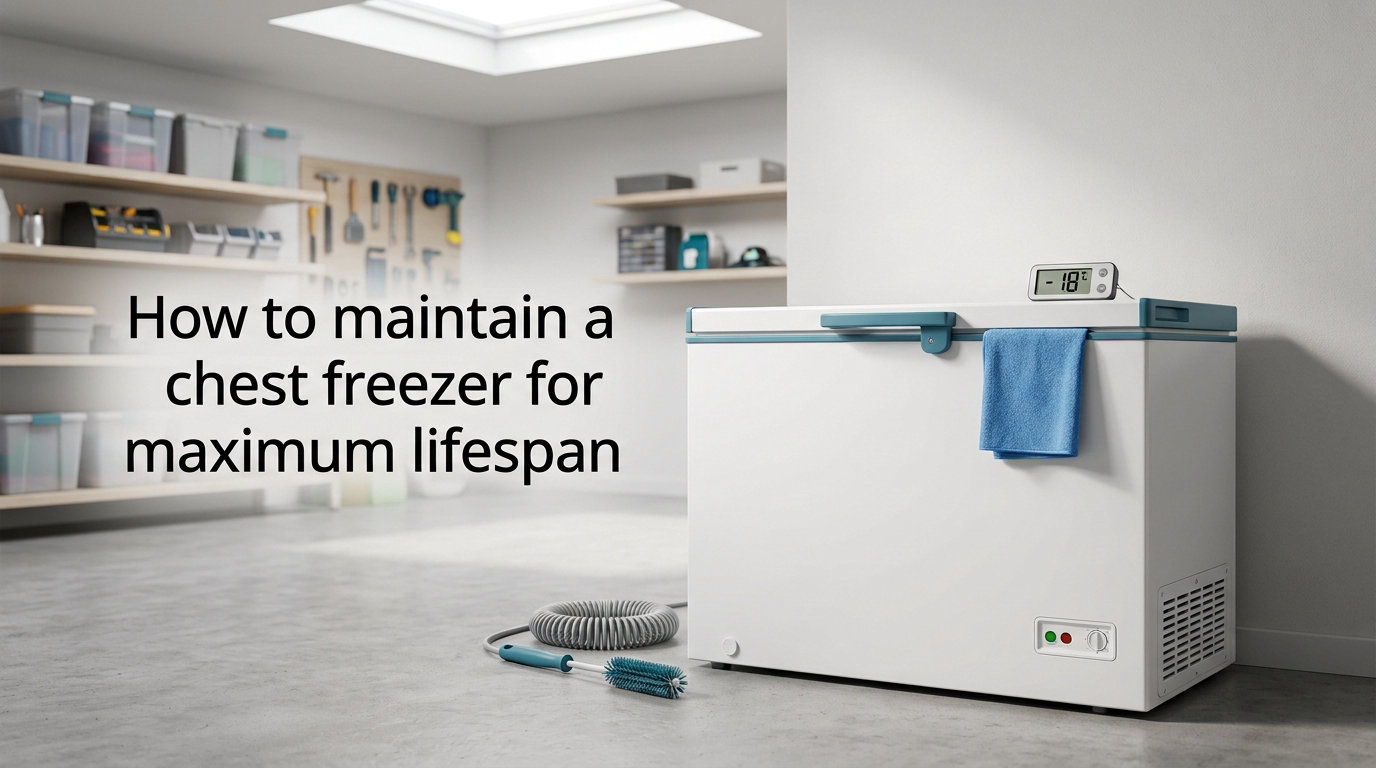
Learning how to maintain a chest freezer for maximum lifespan is one of the easiest ways to protect a household investment. I have owned three chest freezers over the past 15 years, and the one I cared for properly still runs quietly in my garage today. The other two taught me what happens when neglect creeps in. This guide walks you through the exact routine I use, plus the troubleshooting tips our team has gathered from hundreds of hours of research and reader feedback.
Whether you just bought a new deep freezer or want to squeeze another decade out of an older model, the steps below will help you keep food safe, electricity bills low, and your freezer humming along for years to come.
Table of Contents
Why Chest Freezer Maintenance Matters in 2026?
A chest freezer is a workhorse appliance that runs 24/7, 365 days a year. Without regular care, dust, frost, and worn seals push the compressor to work harder than it should. That extra workload shows up on your power bill and shortens the life of the unit.
According to multiple industry sources, the average chest freezer lasts about 13 years. With proper maintenance, however, many units run 20+ years before the compressor gives out. That difference of seven years can save you hundreds of dollars and keep a large appliance out of the landfill.
Maintenance also protects your food. Ice buildup insulates the interior, forcing temperatures to drift upward. When the thermometer climbs above 0°F for too long, bacteria can grow even in frozen food. A clean, well-tuned freezer stays cold enough to keep your groceries safe.
Three core benefits drive every step in this guide:
Energy savings – clean coils and tight seals can cut electricity use by 10 to 15 percent.
Food safety – stable temperatures prevent spoilage and freezer burn.
Lifespan extension – routine care can add 5 to 10 years to your freezer’s life.
For homeowners, those benefits translate to real money. The U.S. Department of Energy estimates that a refrigerator or freezer accounts for roughly 7 percent of a household’s annual electricity use. Cutting that bill by 10 to 15 percent saves the average family $20 to $40 per year. Over a decade, that is enough to cover a brand new freezer.
How to Maintain a Chest Freezer: Step-by-Step Guide
This is the core routine I follow on every chest freezer I own. Split the work into quarterly tasks and a yearly deep clean, and the job never feels overwhelming. The whole routine takes less than four hours per year once you get into the habit.
Step 1: Defrost Your Chest Freezer Regularly
Defrosting is the single most important maintenance task. When frost builds up to a quarter inch or more on the interior walls, the freezer has to run longer and harder to keep food frozen. I defrost each of my units once or twice a year, depending on how often the door gets opened.
Some modern chest freezers advertise “frost free” operation, but that label can be misleading. Frost-free models use a heater to melt small amounts of frost on a timer, but they still develop ice buildup over time, especially in humid environments. Manual defrosting remains the most reliable way to keep the interior clear.
To defrost a chest freezer the right way, follow these steps:
Pick a day when the freezer is relatively empty, or transfer food to coolers with ice packs.
Unplug the unit and pull it away from the wall for airflow.
Place old towels on the floor around the base to catch melt water.
Leave the lid open and let the ice melt naturally. Avoid sharp tools that can puncture the liner.
Speed up the process with a bowl of hot water inside, or aim a fan at the open freezer.
Wipe down the interior with a baking soda solution (one tablespoon per quart of warm water) once all the ice is gone.
Dry everything thoroughly, plug the unit back in, and let it run for 30 minutes before reloading food.
This defrosting routine typically takes three to four hours from start to finish. Doing it in the morning lets you reload by dinner without losing food quality.
A few extra tips make defrosting easier. Start with a cooler packed with ice from a local gas station if you have a full freezer. Place a small fan pointed into the open lid to cut melting time in half. Never use a hair dryer or heat gun inside the freezer, since the moisture and electrical components create a shock hazard.
Step 2: Clean the Interior
The interior of a chest freezer collects spills, crumbs, and odors over time. I clean the inside every time I defrost, and I do a quick wipe-down every two to three months. Use a mild solution of baking soda and water rather than harsh chemicals, which can leave smells that transfer to food.
For stubborn odors, leave an open box of baking soda inside with the lid closed for 24 hours after cleaning. Replace the box every three months. Activated charcoal bags work just as well if you prefer a low-maintenance option.
Wipe down the door seals and corners where crumbs tend to collect. A soft toothbrush helps reach the seams along the bottom of the interior. If you spot any pink or black mildew, scrub it with a diluted bleach solution of one tablespoon bleach per gallon of water, then rinse thoroughly with clean water.
Step 3: Clean the Condenser Coils
Condenser coils release the heat that the compressor pulls out of the freezer. When those coils get covered in dust, pet hair, or lint, the unit cannot shed heat efficiently. That makes the compressor run constantly and drives up your electric bill.
Most chest freezers have coils on the back or underneath the unit. To clean them, unplug the freezer and use a vacuum cleaner with a brush attachment or a long handled coil brush. Work gently to avoid bending the thin metal fins.
Our team recommends cleaning coils every six months. If you have shedding pets or a dusty garage, bump that up to every three months. The difference is noticeable in both the freezer’s temperature stability and the sound it makes.
For under-unit coils, you may need to tip the freezer gently forward or use a long flexible brush to reach underneath. Some newer models have a removable front kick plate that gives easy access. Always check the owner’s manual for the exact coil location before cleaning.
Step 4: Inspect and Care for the Lid Gasket
The gasket is the rubber seal around the lid that keeps cold air in and warm air out. A worn or dirty gasket forces the compressor to run longer and can cause frost buildup even in a clean freezer. I check mine twice a year and replace it whenever I see cracks, tears, or stiffness.
To test the gasket, close the lid on a piece of paper or a dollar bill and try to pull it out. If it slides freely, the seal is no longer tight. You can also run your hand along the closed lid and feel for cold air escaping.
Clean the gasket with warm water and a small amount of dish soap. Avoid petroleum-based cleaners, which can damage the rubber. Apply a thin layer of petroleum jelly to the seal a few times per year to keep it supple and prevent drying out.
Replacement gaskets are available for most major brands and cost $20 to $50. Installing one is usually a simple matter of pulling the old gasket out of its channel and pressing the new one into place. This is one of the most cost-effective repairs a homeowner can do.
Step 5: Set and Monitor the Correct Temperature
The ideal chest freezer temperature is 0°F (or -18°C). At this setting, food stays safely frozen and the freezer runs efficiently. I keep a basic analog thermometer inside each unit and check it monthly. Digital thermometers with high and low memory are even better because they catch temperature spikes you might miss.
If the thermometer reads above 0°F, check the gasket first, then the coils, and finally the door seal alignment. Adjust the thermostat in small increments and give the unit 24 hours to stabilize before checking again.
For long-term storage of meat and other proteins, some users prefer -10°F to -20°F for extra safety. Colder temperatures also slow freezer burn. Just remember that the colder you set the unit, the harder the compressor works and the more electricity it uses.
Step 6: Organize Contents for Air Circulation
Good airflow inside a chest freezer keeps temperatures even and prevents warm spots. Avoid packing food tightly against the walls or the lid. Use stackable baskets or bins to group similar items and leave gaps between them so cold air can move freely.
Labelling bins with the contents and dates saves time and reduces the amount of time the lid stays open. I learned this the hard way after losing track of a quarter of a beef in the back of an unorganized freezer. A simple label system prevents that kind of waste.
Place older items in the front and on top so you use them first. Newer additions go to the back and bottom. This rotation prevents food from being forgotten and spoiling, which is one of the most common causes of odor problems in long-term freezer storage.
Step 7: Manage the Load (75 to 85 Percent Full)
A chest freezer works best when it is about three-quarters to four-fifths full. The frozen food itself acts as thermal mass, helping the unit hold its temperature during short power blips and reducing how often the compressor cycles on.
An empty freezer has to work harder to maintain temperature, while an overstuffed one blocks airflow. If your freezer is consistently too full, consider whether a second unit would be a better investment. If it is too empty, fill milk jugs with water and freeze them to take up the slack.
Many modern freezers include a fast-freeze setting for adding large quantities of fresh food. Use this feature when you return from a bulk shopping trip or a hunting season. It temporarily drops the temperature to freeze new items quickly without raising the temperature of food already stored.
Step 8: Care for the Exterior
Wipe down the outside of the freezer every few months with a damp cloth and mild soap. Pay attention to the control panel, handles, and the area around the hinges. A clean exterior prevents dust from migrating into the coils and keeps the unit looking good in your garage or basement.
Check the power cord for damage during exterior cleanings. A frayed cord is a fire hazard and should be replaced before the unit is plugged back in. If the cord runs across a high-traffic area, secure it with cable covers to prevent tripping or accidental unplugging.
Placement Considerations for Long-Term Performance
Where you put your chest freezer affects how well it runs and how long it lasts. Three placement factors matter most: ventilation, level surface, and ambient temperature. Get these right and your freezer will reward you with years of reliable service.
Allow Clearance on All Sides
Chest freezers need at least three inches of clearance on all sides for proper airflow. If the unit is too close to a wall or tucked into a tight corner, heat cannot escape. I keep mine at least four inches from the back wall and a few inches from the sides so air can circulate freely.
Avoid placing a freezer directly next to a heat source like an oven, dryer, or water heater. The extra heat forces the compressor to work harder and shortens its lifespan. If your basement or garage gets warm in summer, consider a small fan to push air across the unit.
Keep the Freezer Level
A chest freezer that sits on an uneven surface can cause the lid to misalign and the gasket to fail. Use a bubble level on top of the unit and shim the feet until it sits flat. This is one of those small steps that prevents bigger problems later.
Concrete basement floors can develop uneven spots over time. Check the level every six months, especially if you have moved the freezer or notice it leaning. A freezer that rocks when you push against it is not level.
Watch Garage Temperatures
Standard chest freezers are designed to operate in ambient temperatures between 55°F and 110°F. In an unheated garage during winter, the freezer may struggle to keep food frozen. Some manufacturers make “garage ready” units rated for temperatures as low as 0°F. If your garage gets cold, look for that rating when buying or upgrading.
In hot climates, garage temperatures can push the compressor to its limits. Provide shade or ventilation in the summer to keep the unit from overheating. Direct sunshine on a garage door can raise interior temperatures above 120°F in southern states, which is outside the safe operating range for most chest freezers.
Seasonal Care Differences for Year-Round Performance
Chest freezers need slightly different care in summer and winter. Understanding these seasonal shifts helps you stay ahead of problems before they appear.
Summer Maintenance Focus
Hot summer air makes the compressor work harder. Clean the coils at the start of summer, since dust buildup during spring can choke the cooling system. Check the room temperature around the freezer and add ventilation if necessary. Avoid opening the lid frequently during heat waves, since every opening pulls warm, humid air into the unit.
Freezer burn is also more common in summer because hot air carries more moisture. Wrap food tightly in freezer paper or vacuum-sealed bags to prevent ice crystals from forming on the surface. Properly wrapped food stays fresh two to three times longer than loosely wrapped food.
Winter Maintenance Focus
Cold garages can cause the compressor to fail in winter, especially on standard units rated for 55°F and above. If your garage drops below 55°F, consider moving the freezer to a basement or climate-controlled space. Garage-ready units are designed for this scenario and are worth the investment if your garage is the only practical option.
Watch for condensation on the outside of the unit during winter months. If the room is humid and the freezer surfaces are cold, moisture can collect and damage the paint or promote rust. Wipe down the exterior with a dry cloth if you notice any dampness.
Troubleshooting Common Chest Freezer Problems
Even with great maintenance, things go wrong. These troubleshooting tips cover the most common issues our readers report. Skip the service call and try these fixes first when the problem is simple.
Why Is My Chest Freezer Running Constantly?
A freezer that runs nonstop is usually fighting one of three issues: dirty coils, a worn gasket, or a failing thermostat. Clean the coils first, then test the gasket with the paper test described above. If both check out, place a thermometer inside and watch the temperature over 24 hours. If the temperature is correct but the unit never stops, the thermostat may be on its way out.
Another common cause is overloading. A freezer packed too tightly has to run constantly to pull heat through the dense mass of frozen food. Remove some items and see if the compressor cycles normally after a few hours.
Ice Buildup That Returns Quickly
Recurring frost typically means warm air is leaking in. Inspect the gasket, check the lid alignment, and make sure nothing is preventing the lid from closing fully. A common culprit is a heavy bag of food resting on the edge of the lid, holding it slightly open.
High humidity also contributes to frost. If you live in a humid climate, defrost more often and consider a small dehumidifier in the room where the freezer operates. Door-opening frequency matters too. Each opening pulls in warm, humid air that freezes on the interior walls.
Freezer Will Not Cool Properly
If the freezer is running but not getting cold, check the temperature setting first. Then verify the condenser coils are clean and the compressor is actually cycling. A silent compressor that does not kick on usually means an electrical issue, a tripped breaker, or a failed component. Call a technician if basic checks do not resolve the situation.
Listen for the compressor to start within a few minutes of plugging the unit back in. If you hear a click but no hum, the compressor motor may be seized. If you hear a hum but the unit does not cool, you may have a refrigerant leak, which requires professional service.
Strange Noises
Chest freezers make a low hum and occasional clicks as the compressor cycles. Loud buzzing, grinding, or rattling noises point to a problem. A rattling sound may be a loose panel or a failing fan. Buzzing that persists with no cooling often indicates a compressor issue. Unplug the unit and call a professional if noises escalate.
Some noises are normal. A popping sound can come from the interior walls expanding or contracting with temperature changes. A soft gurgling is the refrigerant moving through the lines. Loud knocking or clanking, on the other hand, is a sign something is loose or broken inside.
Water Under the Freezer
Small amounts of water underneath the unit during defrosting are normal. Constant water or a puddle that returns between defrosts can signal a clogged drain line or a cracked drip pan. Most chest freezers have a small drain hole inside that can be cleared with a pipe cleaner and warm water.
If the drain pan is cracked, replacement pans are inexpensive and easy to install. A small leak ignored for months can damage flooring or promote mold, so address any water issue quickly.
Freezer Smells Bad
A persistent bad smell usually means food has spoiled somewhere in the freezer. Unplug the unit, empty everything, and look for forgotten packages in the bottom. Discard anything that smells off and clean the interior thoroughly with a baking soda solution. Place an open box of baking soda inside for 48 hours to absorb any lingering odors.
Lifespan Factors and When to Replace
How long does a chest freezer last? The honest answer is anywhere from 10 to 25 years depending on the brand, usage, and maintenance. Brands like Haier, Frigidaire, and Kenmore are commonly cited by readers as reliable long-term picks. Our team has seen real-world reports of 20-year-old units still running strong, and others that gave out before year five.
Factors That Affect Lifespan
Several variables influence how long a chest freezer lasts:
Brand and build quality – higher-end models often use more durable compressors.
Usage patterns – frequent door opening or heavy loading shortens lifespan.
Ambient temperature – extreme heat or cold forces the compressor to work harder.
Maintenance consistency – regular cleaning and defrosting prevents premature wear.
Power supply quality – frequent voltage spikes can damage electronics and motors.
Signs Your Freezer Needs Replacement
These signs point to replacement rather than repair:
The unit is older than 15 years and has a major component failure.
Repair costs exceed 50 percent of the price of a comparable new freezer.
Energy bills have climbed sharply even with clean coils and a tight seal.
The freezer cannot hold a stable temperature despite troubleshooting.
You see rust on the interior or exterior, or smell chemicals.
Repair vs Replace: A Simple Rule of Thumb
Multiply the age of the freezer by the cost of the repair. If the result is more than the price of a new unit, replace it. For example, a 12-year-old freezer with a $400 repair bill (12 × 400 = $4,800) almost certainly needs replacement. A 5-year-old freezer with the same repair (5 × 400 = $2,000) is worth fixing.
Another simple guideline uses the 50% rule. If the repair costs more than half the price of a comparable new freezer, replace it. This works well for freezers older than 8 years, where repairs are likely to keep coming.
Environmentally Responsible Disposal
Chest freezers contain refrigerant and insulation that can harm the environment if dumped in a landfill. Most municipalities offer appliance recycling programs, and many utility companies will pick up old freezers for free. Search for local appliance recycling options before sending your old unit to the dump.
Some retailers also offer trade-in discounts when you buy a new appliance. These programs often include responsible recycling of the old unit, sparing you the hassle of arranging disposal yourself.
Power Outage Survival Tips for Your Chest Freezer
Few competitors cover what to do when the power goes out, but this is one of the most common real-world concerns. A full chest freezer holds its temperature for about 48 hours when kept closed, while a half-full freezer manages around 24 hours. Use these tips to stretch that window further.
Avoid opening the lid. Every peek lets cold air escape and warm air rush in.
Add dry ice if you have advance warning. 25 pounds of dry ice keeps a full 10-cubic-foot freezer cold for about three days.
Place a penny on top of a frozen cup of water. If the penny sinks to the bottom after the power returns, the food thawed and refroze. Discard anything that thawed for more than four hours.
Group frozen items together in the center. Packed frozen food stays cold longer than spread-out items.
Use a generator if outages are frequent. Even a small inverter generator can keep a freezer running through short blackouts.
Keep blankets or towels around the freezer. Added insulation helps in cold climates, though in hot climates it can trap heat.
Document the outage time. Note when the power went out and when it returned. This helps you decide whether food is still safe to keep.
When to Discard Food After an Outage
The USDA recommends discarding any food that has been above 40°F for more than two hours. Frozen food with ice crystals still intact is usually safe to refreeze. Discard anything that has thawed completely, especially meat, poultry, fish, and dairy products. Soft fruits and vegetables are also safer to discard after a full thaw.
Common Mistakes to Avoid
Several common mistakes shorten the lifespan of chest freezers. Avoid these pitfalls and your unit will run smoothly for years.
Using a sharp tool to chip ice. This punctures the liner and can damage the refrigerant lines. Always let ice melt naturally.
Ignoring the gasket. A bad seal wastes energy and causes frost. Replace the gasket every 5 to 7 years or as soon as it shows wear.
Skipping coil cleaning. Dusty coils are the number one cause of compressor failure. Add this to your calendar.
Overfilling the freezer. Blocking airflow forces the compressor to run constantly. Keep the load between 75 and 85 percent full.
Leaving the freezer empty for long periods. An empty freezer works harder. If you are not using it, unplug it and leave the lid slightly open to prevent mold.
Using harsh chemicals inside. Ammonia and bleach can leave residues that affect food. Stick with baking soda and water.
Chest Freezer Maintenance Checklist (2026 Schedule)
Print this checklist and stick it to the side of your freezer. Following it on schedule takes less than 30 minutes per quarter and just a few hours for the yearly deep clean. Our team has used this exact schedule for years and seen chest freezers stay reliable well past the 20-year mark.
Monthly Tasks
Check interior thermometer reading
Wipe down the lid seal with a damp cloth
Confirm the freezer is level and not shifted
Listen for unusual noises during normal operation
Quarterly Tasks
Vacuum the condenser coils (or sooner if you have pets)
Wipe the exterior and control panel
Inspect the power cord for damage
Reorganize contents if needed
Check the gasket with the paper test
Twice Yearly Tasks
Defrost the freezer (or when frost exceeds 1/4 inch)
Clean the interior with baking soda solution
Replace the baking soda box inside
Test the gasket with the paper test
Apply petroleum jelly to the gasket
Yearly Tasks
Deep clean the condenser coils and compressor area
Apply petroleum jelly to the gasket
Check the thermostat calibration with a separate thermometer
Plan for any part replacements before they fail
Review the unit’s overall performance and energy use
Frequently Asked Questions About Chest Freezer Care
How long does a chest freezer last on average?
The average chest freezer lasts 13 years with basic care. With the maintenance routine outlined in this guide, many units reach 20 to 25 years before the compressor fails. Brands like Haier, Frigidaire, and Kenmore are commonly cited as reliable long-term options.
How often should I defrost my chest freezer?
Defrost your chest freezer once or twice per year, or whenever frost buildup reaches a quarter inch on the interior walls. Heavy users who open the lid daily may need to defrost every six months. Light users can stretch that to once a year if frost stays under a quarter inch.
What temperature should a chest freezer be set at?
Set your chest freezer to 0°F (-18°C). This temperature keeps food safely frozen, prevents bacterial growth, and allows the compressor to run efficiently. Use a separate thermometer inside the unit to verify the actual temperature, since built-in dials can be off by several degrees.
Why do people put a penny on a cup of water in the freezer?
The penny trick is a power outage test. Place a penny on top of a frozen cup of water before a storm. If the power goes out and the food thaws, the penny will sink to the bottom of the cup. When the power returns, you can see immediately whether the freezer stayed cold enough to keep food safe.
Should I replace a 20-year-old freezer?
A 20-year-old freezer that still runs is usually inefficient compared to modern ENERGY STAR models. Replacement is worth considering if your electricity bill has climbed, if the unit struggles to hold temperature, or if any major component fails. New freezers use 10 to 25 percent less energy than units made two decades ago.
Can a chest freezer stay in an unheated garage?
Standard chest freezers are designed for ambient temperatures between 55°F and 110°F. In an unheated garage that drops below 55°F, the compressor may not cycle properly and food can thaw. Garage-ready models are rated for temperatures from 0°F to 110°F and are a better choice for unheated spaces.
Final Thoughts on Long-Term Chest Freezer Care
Knowing how to maintain a chest freezer for maximum lifespan comes down to a short list of repeatable habits. Defrost when frost hits a quarter inch, clean the coils twice a year, keep the gasket clean and supple, and check the temperature monthly. Add a 30-minute quarterly checkup and you will own a freezer that runs quietly for two decades or more.
Our team has seen firsthand how a few minutes of care each season keeps a chest freezer running smoothly. Pick one task from the checklist above, schedule it on your calendar for 2026, and start building the habit today. Your freezer, your wallet, and your frozen groceries will all thank you.