
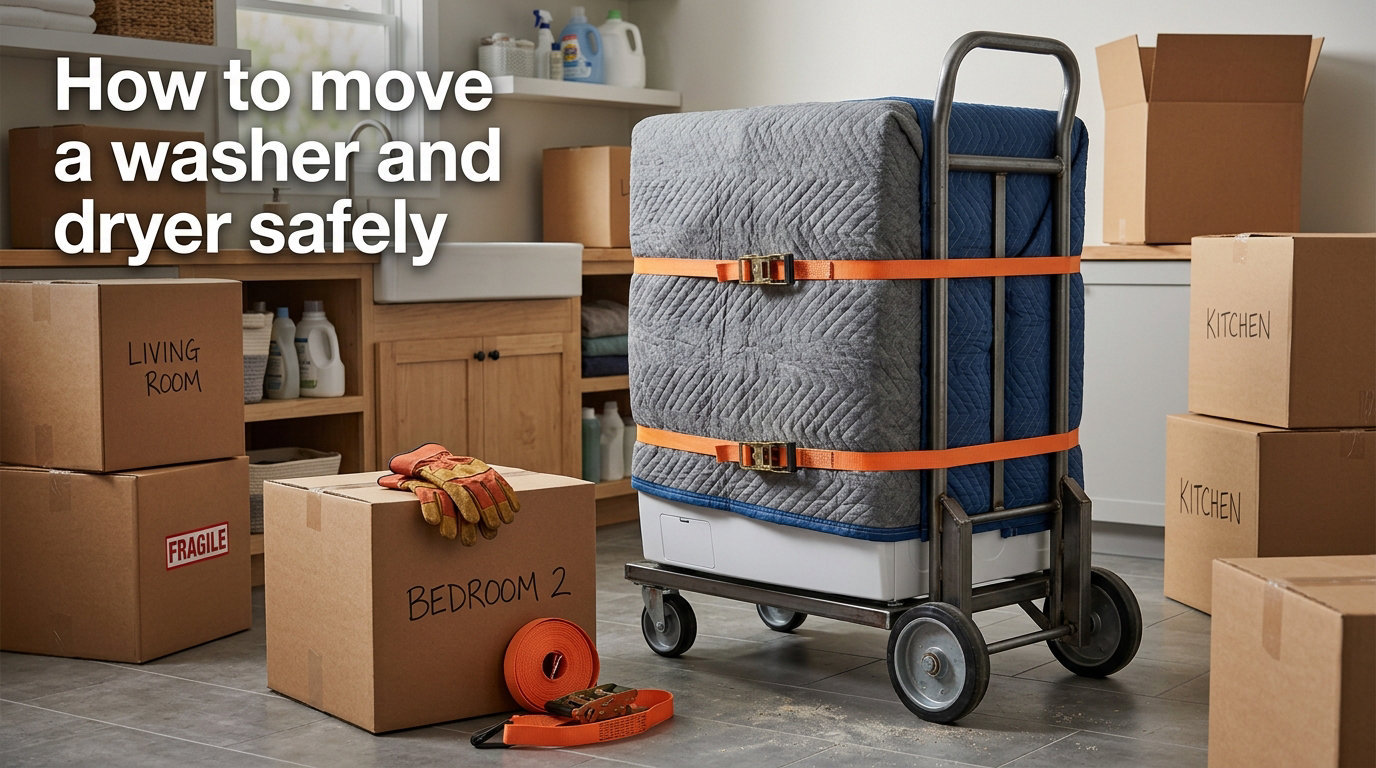
Washers and dryers are among the heaviest and most delicate appliances in any home, weighing anywhere from 120 to over 350 pounds. Learning how to move a washer and dryer safely protects both your expensive appliances and your back. One wrong lift, a skipped step on drum stabilization, or an improperly secured load can turn a routine relocation into a costly disaster.
Our team has broken down the entire process into clear, numbered steps that anyone can follow. You will learn exactly how to prepare each appliance, disconnect it safely, stabilize the drum, and transport it without scratching your floors or damaging the suspension system. We also cover the situations most guides skip, including gas dryers, stacked units, and what to do if you do not own an appliance dolly.
Whether you are moving across town or just pulling the units out to clean behind them, this guide gives you the complete picture. Follow these steps in order, gather your tools first, and take your time on moving day.
Table of Contents
Tools and Supplies You Will Need
The right equipment makes the difference between a smooth move and a dangerous struggle. Gather everything on this checklist before you touch a single appliance.
Appliance dolly — A heavy-duty dolly with a strap and a curved back that hugs the shape of the machine. This is the single most important tool for the job.
Transit bolts or shipping bolts — These threaded rods lock the washer drum in place during transport. Check your owner’s manual or look for a set stored in the back panel.
Moving blankets or furniture pads — Wrap each appliance to prevent dents, scratches, and damage to walls and doorframes.
Ratchet straps — Secure the appliances to the dolly and to the walls of your moving vehicle.
Furniture sliders — Use felt sliders on hardwood and plastic sliders on carpet to glide units across the floor without lifting.
Pliers and an adjustable wrench — For loosening hose connections and tightening transit bolts.
Bucket and towels — Water always remains in the hoses and pump even after draining. Be ready to catch it.
Packing tape or painter’s tape — Secure cords and doors. Avoid duct tape, which leaves a sticky residue.
Forearm forklift moving straps (optional) — A good backup if two people are carrying a unit without a dolly.
Helper — Even with the best equipment, moving these appliances safely requires at least two people.
If you cannot find your transit bolts, contact the manufacturer or order a replacement set online before moving day. Skipping this step is the number one cause of washer suspension damage.
Before You Start: Measure and Plan Your Path
Planning your route saves you from getting stuck halfway through a doorway with a 200-pound machine. Measure every doorway, hallway, and stairwell the appliances must pass through, and compare those numbers to the width and depth of each unit.
A standard washer is about 27 inches wide, while a typical interior door opening is 30 inches. That leaves less than three inches of clearance, and angled approaches eat into that margin fast. If the path is tight, remove doors from their hinges to gain an extra two inches.
Check the weight of your specific models in the owner’s manual. Front-load washers tend to be the heaviest, often exceeding 200 pounds because of their concrete counterweights. Top-load washers are lighter but still demand two people and proper equipment.
Walk the entire route and note any tight corners, stairs, or uneven surfaces. Clear rugs, toys, and loose items out of the way before you start moving.
How to Move a Washer and Dryer Safely: Step-by-Step
The safest way to move a washer and dryer is to follow a strict sequence: prepare, disconnect, stabilize, wrap, load, and secure. Skipping or reordering any step risks damage to the appliance, your home, or your body.
Step 1: Clean and Empty Both Appliances
Run a final cleaning cycle through the washer with hot water and a washing machine cleaner or white vinegar. This removes residual detergent and prevents mold from forming inside the drum during transit or storage.
Empty the dryer lint trap and wipe down the interior drum. Remove any items left inside both machines, including the lint screen, dryer sheets, or forgotten socks.
Leave the doors or lids open for several hours so the interiors dry completely. Trapped moisture leads to mildew, especially on long-distance moves.
Step 2: Disconnect the Power
Always cut power before touching any hoses or connections. For an electric dryer, turn off the breaker at your electrical panel. For a gas dryer, shut off the gas supply valve and turn off the breaker.
Unplug the washer from the wall outlet. If your washer is hardwired, switch off the breaker and label the circuit before disconnecting any wires.
Bundle the power cords with a twist tie and tape them flat against the back or side of each machine. Loose cords get caught on doorframes and can pull connections loose.
Step 3: Shut Off and Disconnect the Water (Washer)
Locate the water supply valves on the wall behind the washer and turn both the hot and cold valves clockwise until they stop. Never disconnect the hoses while the water is still pressurized.
Place a bucket underneath the connections. Use pliers or an adjustable wrench to loosen the hose fittings where they connect to the wall and to the back of the washer. Water will spill out, so keep towels handy.
Disconnect the drain hose from the standpipe or laundry sink. Lower it into the bucket to let any remaining water drain out of the hose.
Step 4: Drain Remaining Water from the Washer
Even after disconnecting the hoses, a washer still holds water inside the pump and internal lines. Lower the drain hose to floor level and let gravity pull the remaining water into your bucket.
Some front-load washers have a small access panel near the bottom front with an emergency drain tube or filter cap. Open it, place a shallow pan underneath, and drain the water slowly.
Tilt the washer gently forward and backward to encourage any trapped water to flow out through the drain hose. Expect up to a gallon of water total.
Tape the hoses to the back of the machine so they do not drag or snag during the move.
Step 5: Stabilize the Washer Drum with Transit Bolts
This is the most critical step for protecting your washer. The drum hangs on a suspension system designed to move freely during the spin cycle. Without stabilization, the drum bangs around inside the cabinet during transport and destroys that suspension.
Install the transit bolts (also called shipping bolts) into the designated holes on the back panel of the washer. These holes are usually covered by small plastic plugs that you pry out.
Thread each bolt in by hand first to avoid cross-threading, then tighten with a wrench until the drum is firmly locked in place. Consult your owner’s manual for the exact location and number of bolts your model requires.
Forum users on r/Appliances consistently warn that skipping transit bolts is the fastest way to ruin a washing machine. If your bolts are lost, order replacements before moving day rather than risk the move without them.
Step 6: Disconnect the Dryer (Vent, Power, and Gas)
Disconnecting a dryer is simpler than a washer but requires extra care if it runs on gas. Start by unplugging an electric dryer or switching off its breaker.
For an electric dryer: Loosen the clamp on the vent hose where it connects to the back of the machine and pull the hose free. If the power cord is removable, disconnect it and tape it to the back.
For a gas dryer: Turn off the gas supply valve completely before doing anything else. Use two wrenches to disconnect the gas line, one to hold the fitting on the dryer and one to turn the connector nut. Check for any gas smell. If you smell gas at any point, stop immediately, ventilate the area, and call your gas company.
Gas line disconnection makes many homeowners nervous, and rightly so. If you are not comfortable working with gas lines, hire a licensed plumber or appliance technician to handle the disconnection and reconnection. The peace of mind is worth it.
Pull the vent hose free from the back of the dryer, clean out any accumulated lint, and tape the hose to the machine or coil it separately.
Step 7: Wrap and Protect Both Appliances
Wrap each appliance in a moving blanket, covering all sides completely. Secure the blanket with packing tape or ratchet straps so it cannot shift during transport.
Tape the washer lid or dryer door shut with painter’s tape. Painter’s tape holds securely but removes cleanly without leaving adhesive residue on the finish.
Stuff small towels or bubble wrap into gaps between moving parts to prevent rattling. Pay attention to the dispenser drawer on the washer, which can pop open and break off.
Step 8: Load Each Unit onto the Appliance Dolly
Position the dolly next to the appliance. With one person on each side, tilt the machine back just enough to slide the dolly’s base plate underneath. The curved back of the appliance dolly should cradle the machine.
Wrap the dolly’s strap around the middle of the appliance and ratchet it tight. The strap should sit across the center of the machine, not near the top where it could slip off.
Test the setup by tilting the dolly back slightly. If the machine feels loose or shifts, reposition and retighten the strap before moving.
Never use a standard hand truck or furniture dolly for a washer or dryer. These lack the strap, the weight capacity, and the curved back needed to hold a tall, heavy appliance securely.
Step 9: Move Through Doorways and Down Stairs
Tilt the dolly back to a 45-degree angle and wheel the appliance slowly along your planned route. Keep the person in back controlling the tilt while the person in front guides and watches for obstacles.
For doorways, angle the appliance diagonally to maximize clearance. Protect doorframes with a moving blanket or cardboard if the fit is tight.
For stairs, the person at the bottom takes most of the weight while the person at the top guides the dolly up or down one step at a time. Always go slowly and communicate each step. If a stairwell has a turn, use a shoulder dolly or forearm forklift straps instead of a wheeled dolly.
For tight closet spaces or stacked units, Reddit users on r/HomeImprovement recommend measuring the exact angle of approach before attempting the pull-out. A few minutes of geometry saves a damaged wall.
Step 10: Load and Secure in the Moving Vehicle
Use a ramp to wheel the dolly up into the truck or van. Keep the appliance upright at all times and never lay it on its side.
Position each appliance against a wall of the vehicle. Secure it with ratchet straps anchored to the truck’s tie-down points, tightening until the machine cannot shift in any direction.
Place heavier items like the washer on the bottom if stacking other belongings nearby. Never stack boxes on top of the appliances.
Drive carefully. Sudden stops, sharp turns, and bumpy roads put stress on the straps and the appliance suspension even with transit bolts installed.
Special Situations: Stacked Units, Gas Dryers, and No-Dolly Moves
Some moves fall outside the standard process and need a different approach. Here is how to handle the three trickiest scenarios.
Moving a Stacked Washer and Dryer
Stacked units present a serious challenge because they are tall, top-heavy, and often wedged into tight laundry closets. The safest approach is to separate the two appliances before moving them whenever possible.
Unbolt the stacking kit that connects the dryer to the washer, then move each unit individually. If separation is not possible, you will need at least three people, an extra-tall appliance dolly, and ratchet straps securing both units together and to the dolly.
Measure the stacked height against every doorway and ceiling clearance along your route. Many stacked units exceed 75 inches tall and will not pass through a standard interior doorframe without tilting.
Moving Without an Appliance Dolly
If you do not have access to an appliance dolly, you still have options. Furniture sliders work well for short moves across a flat floor, especially for pulling units out to clean behind them.
Forearm forklift straps let two people carry an appliance using leverage rather than raw strength. Slip the straps under the machine, thread them through your forearms, and lift together on a coordinated count.
For moving down a single step or over a threshold, a sturdy plywood ramp combined with furniture sliders lets you glide the unit across the gap. Never attempt to carry a washer or dryer solo, no matter how strong you are.
Gas Dryer Safety
Gas dryers carry risks that electric dryers do not. Always shut off the gas supply at the valve before disconnecting anything, and double-check that the valve is fully closed.
After disconnecting the gas line, cap the open end of the supply pipe to prevent residual gas from leaking into the room. You can buy a gas line cap at any hardware store for a few dollars.
If you smell gas at any point during disconnection, stop, leave the area, and call your gas utility company. Do not flip light switches or use your phone near the suspected leak.
Floor and Wall Protection During the Move
Floors take a beating during any appliance move, but the right sliders prevent almost all damage. Match your slider type to your flooring for the best results.
Use felt-bottom sliders on hardwood, laminate, and vinyl floors. Felt glides smoothly without scratching or gouging the surface. Replace the felt pads if they pick up grit, since trapped sand acts like sandpaper.
Use hard plastic sliders on carpeted surfaces. Plastic slides easily over carpet fibers where felt would catch and drag.
Lay down cardboard or hardboard sheets along the entire path for extra protection on high-end floors. Tape the sheets together at the seams so they do not separate as you roll the dolly across them.
Protect walls and doorframes with moving blankets taped in place at corners and narrow passages. A stray corner of a washing machine can punch a hole in drywall in seconds.
Safety Tips and Common Mistakes to Avoid
Safety comes down to a few simple principles. Here are the most common mistakes people make, drawn from forum discussions and real-world moving experiences.
Never lay a washer or dryer on its side. Laying these appliances down lets oil from the suspension or compressor leak into places it should not be. Always keep them upright.
Do not skip the transit bolts. Without drum stabilization, the internal suspension breaks during transport. This damage is often irreparable.
Lift with your legs, not your back. These appliances weigh 120 to 350 pounds. Use the dolly for transport and let your equipment do the heavy work.
Never move a gas dryer with the gas line connected. Always disconnect and cap the line before transporting.
Do not drag appliances across the floor. Dragging scratches hardwood, tears vinyl, and can crack the appliance feet. Use sliders or a dolly.
Always work with a partner. Solo moves are the leading cause of appliance drops, back injuries, and damaged floors.
Do not use duct tape on the appliance finish. It leaves a stubborn residue that is difficult to remove. Use painter’s tape instead.
If at any point the move feels beyond your physical ability or skill level, stop and call a professional mover. The cost of a moving service is far lower than the cost of a ruined appliance, a back injury, or a flooded floor.
After the Move: Reinstallation and Leveling
The job is not finished when the appliances reach their new home. Proper reinstallation ensures they run quietly and last for years.
Remove the transit bolts from the washer before plugging it in or running a cycle. Running a washer with the transit bolts still installed can damage the motor and suspension in a different way than running without them.
Reconnect the water supply hoses to the hot and cold inlets, making sure each goes to the correct valve. Reconnect the drain hose to the standpipe and the vent hose to the dryer.
Level each appliance using the adjustable feet on the bottom corners. Place a bubble level on top of the machine and turn the feet clockwise or counterclockwise until the bubble centers in all directions. An unlevel washer vibrates violently and walks across the floor during the spin cycle.
Run a short test cycle on the washer with no clothes to check for leaks at every connection. Check the dryer vent for proper airflow by holding your hand near the exterior vent while it runs.
Store your transit bolts in a labeled bag near the washer so they are easy to find the next time you move.
FAQs
What is the easiest way to move a washer and dryer?
The easiest way is to use an appliance dolly with a securing strap, work with at least one other person, and prepare each machine properly before lifting. Stabilize the washer drum with transit bolts, disconnect all power and water, wrap the appliances in moving blankets, and strap them to the dolly for transport. For most people, hiring professional movers is the easiest option of all.
Can you move a washer and dryer with a regular dolly?
A regular hand truck or furniture dolly is not recommended for washers and dryers. These appliances are too tall, heavy, and unstable for a flat-bed or standard upright dolly. You need an appliance dolly, which has a curved back that cradles the machine, a weight rating of 700 pounds or more, and a built-in ratchet strap to hold the unit securely.
Does a washing machine need to be drained before moving?
Yes, a washing machine must be drained before moving. Even after disconnecting the hoses, water remains inside the pump and internal lines. Lower the drain hose to floor level to let gravity empty it, and open the emergency drain panel at the bottom front of front-load machines. Expect up to a gallon of water to come out.
Can you lay a washer and dryer on their side to move them?
No, you should never lay a washer or dryer on its side. Laying these appliances down allows oil and internal fluids to leak into components where they cause damage. Always keep both appliances upright during the entire move, and secure them upright in your moving vehicle with ratchet straps.
Conclusion
Knowing how to move a washer and dryer safely comes down to preparation, the right equipment, and following each step in order. Clean and empty the machines, disconnect power and water, install transit bolts, wrap everything in moving blankets, and use an appliance dolly with a partner. Keep both appliances upright at all times, and protect your floors with the correct sliders for your surface.
The steps that competitors and forums emphasize most are drum stabilization and never laying the machines on their side. Nail those two, use proper equipment, and you will avoid the most common and most expensive mistakes. Take your time, measure your path, and do not hesitate to call professionals if the job exceeds your comfort level.