
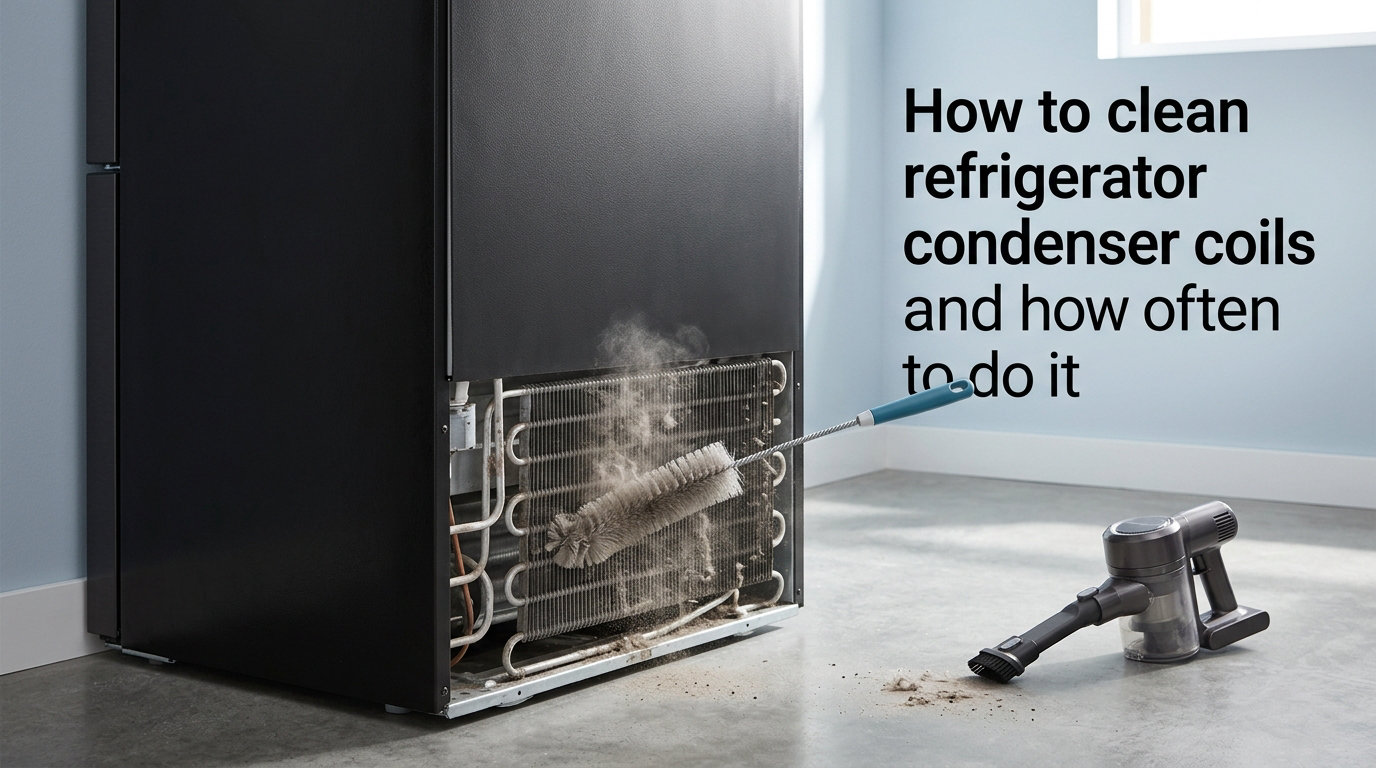
Your refrigerator is one of the hardest-working appliances in your home, running around the clock to keep your food cold. But hidden underneath or behind it, a set of condenser coils quietly does the heavy lifting of releasing heat so the compressor can do its job. When those coils get caked in dust, lint, and pet hair, your fridge has to work a lot harder, burn more electricity, and run the risk of an early breakdown.
The good news is that cleaning refrigerator condenser coils is one of the simplest and cheapest maintenance tasks you can do yourself. You do not need a technician, special training, or expensive tools. In this guide, our team breaks down exactly how to clean refrigerator condenser coils, how often to do it based on your household, and how to tell when your coils are overdue for a cleaning.
Most homeowners we have talked to are shocked the first time they pull their fridge out and see what has accumulated on those coils. One Reddit user in r/HomeMaintenance described vacuuming up what looked like a felt blanket of dust and pet fur. After cleaning, their loud, constantly running fridge went quiet again within a day.
Table of Contents
What Are Condenser Coils and Why Cleaning Matters?
Condenser coils are the heat-exchanging tubes that release the heat your refrigerator pulls out of the food compartment. The compressor pumps hot refrigerant gas through these coils, and as air passes over them, the heat dissipates into your kitchen. That heat release is what allows the refrigerant to cool back down and continue the chilling cycle.
When a thick layer of dust and debris coats those coils, the dirt acts like insulation. The heat cannot escape, so the compressor has to run longer and hotter to hit the same target temperature. According to HVAC technicians and multiple appliance manufacturers, dirty condenser coils can reduce cooling efficiency by up to 25 percent.
That efficiency loss translates directly into higher energy bills. A refrigerator running with clogged coils draws more power every single hour of every day. Over months and years, that wasted electricity adds up to real money.
The damage goes beyond your wallet. A compressor that runs constantly runs hotter, and excess heat is the number one killer of refrigerator compressors. Replacing a failed compressor often costs several hundred dollars, and in many cases it makes more sense to just buy a new fridge. Cleaning the coils regularly is the single most effective way to extend the life of your refrigerator.
How Often Should You Clean Refrigerator Condenser Coils?
The short answer is every 6 months for most households. But the right cleaning frequency depends heavily on your living situation, so let us break it down by household type.
For a standard home without pets and with average dust levels, cleaning the condenser coils twice a year is enough. Many people tie this to a seasonal routine, doing one cleaning in the spring and another in the fall. Marking it on your calendar is the easiest way to remember.
If you have shedding pets, the timeline changes dramatically. Pet hair gets pulled into the airflow around your refrigerator and wraps around the coils faster than you might expect. Homes with one or two dogs or cats should clean the coils every 3 to 4 months. Households with multiple long-haired pets may need to clean as often as every 2 months to keep airflow clear.
Homes in dusty environments also need more frequent attention. If you live on a dirt road, near construction, or in an area with high pollen counts, plan to clean the coils every 3 months. The same applies to homes where the refrigerator sits in an open garage or utility room with poor air filtration.
Owners of built-in luxury refrigerators like Sub-Zero or Viking models should follow a stricter schedule. These units often have condenser coils that are more tightly packed and depend on clean airflow to maintain their precise temperature control. Most manufacturers of built-in models recommend cleaning every 3 to 6 months, and some service contracts actually require documented coil cleaning to stay valid.
If you are not sure where you fall on this spectrum, start with a 6-month schedule and inspect the coils after 3 months. If they already look dusty, adjust your routine to clean more often.
Signs Your Refrigerator Coils Need Cleaning
Your refrigerator will usually tell you when its coils are overdue for a cleaning, as long as you know what to watch for. Here are the most common warning signs.
Your fridge feels warm to the touch on the sides or back. This means the compressor is generating excess heat that cannot dissipate through the clogged coils. A healthy fridge should feel only mildly warm on the exterior.
The compressor runs almost constantly and rarely cycles off. You hear the humming sound nonstop, and the fridge never seems to reach a resting state. Clean coils let the compressor cycle on and off in shorter bursts.
Your electricity bill creeps up without another obvious explanation. A dirty-coil fridge can draw noticeably more power, and that shows up on your monthly statement over time.
The inside of the refrigerator or freezer is not as cold as it used to be, or temperatures fluctuate. Food spoils faster, ice cream gets soft, or you notice condensation inside the compartments.
The area around the base or back of the fridge smells dusty or hot. This is a sign that trapped heat and accumulated debris are baking against the warm coils.
If you notice any combination of these signs, it is time to pull the fridge out and check the coils. Catching the problem early prevents compressor strain and keeps your energy costs down.
Tools You Need to Clean Refrigerator Condenser Coils
You do not need a garage full of equipment to clean condenser coils. Most of these tools are things you already own, and the one specialized item costs less than ten dollars.
A coil brush, also called a refrigerator coil brush, is the single most useful tool for this job. It is a long, stiff-bristled brush shaped to fit between the narrow gaps in the coils. You can find one at any hardware store, and they typically cost between 5 and 10 dollars. Many appliance manufacturers sell branded versions with specific part numbers.
A vacuum cleaner with a hose and a brush or crevice attachment handles the bulk of the loose dust and pet hair. A shop vacuum works even better because it can handle larger debris without clogging. Reddit users in r/DIY frequently recommend the shop vac approach for seriously clogged coils.
A clean microfiber cloth or rag lets you wipe down the coils and surrounding area after brushing and vacuuming. Dampen it slightly to pick up stubborn fine dust.
A flashlight helps you see what you are doing, especially if your coils are mounted near the floor behind a base grille where lighting is poor. A phone flashlight works fine.
Optional but useful: a can of compressed air for blowing dust out of tight spots. Use it carefully and at a distance, because high pressure can bend delicate coil fins.
How to Clean Refrigerator Condenser Coils: Step by Step
Cleaning your condenser coils takes about 15 to 30 minutes from start to finish. Follow these steps in order, and take your time with the safety precautions.
Step 1: Unplug the Refrigerator
This is the most important step. Before you touch the coils, unplug the refrigerator from the wall outlet. If the plug is hard to reach, you can shut off the circuit breaker that controls the kitchen refrigerator circuit. Never clean the coils while the unit is powered on, because the fan and exposed electrical components near the compressor create a real safety hazard.
Step 2: Locate the Condenser Coils
Condenser coils are located in one of three places depending on your refrigerator model. On most modern refrigerators, the coils sit behind a base grille or kickplate at the bottom front of the unit. You can pop this grille off by pulling it toward you or removing a couple of screws.
On older refrigerators, the coils are often mounted on the back of the unit in a large grid pattern. You will need to pull the fridge away from the wall to access them. On some built-in models, the coils may be on top, behind a top grille.
Check your owner’s manual if you are not sure. Knowing where the coils are before you start saves time and prevents frustration.
Step 3: Remove the Base Grille or Pull the Fridge Out
For bottom-front coils, snap or unscrew the base grille off the bottom of the refrigerator. Set it aside. For back-mounted coils, carefully pull the refrigerator away from the wall far enough to work behind it. Slide it slowly to avoid scratching your floor, and watch the power cord and water line if your fridge has an ice maker.
A tip from forum users: put a piece of cardboard or a furniture slide under the fridge feet before pulling it out. This protects hardwood and vinyl flooring from gouges.
Step 4: Brush the Coils
Take your coil brush and gently sweep it through the gaps between the coil tubes, working from top to bottom. Use light pressure. The goal is to dislodge dust and lint, not to scrub hard. Aggressive brushing can bend the thin metal fins or damage the refrigerant lines.
Brush in the same direction as the coil fins run, and pay extra attention to corners where pet hair and lint tend to clump together. You will likely see a satisfying cloud of dust fall to the floor.
Step 5: Vacuum the Loose Debris
Once you have loosened the dust with the brush, use your vacuum with the brush or crevice attachment to suck up everything that fell. Run the vacuum directly over and between the coils to pull out dust the brush missed. Go over the floor beneath the coils too, since a lot of debris will have collected there.
For stubborn pet hair wrapped around the coils, use the crevice tool at close range and be patient. You may need to alternate between brushing and vacuuming a few times to get everything.
Step 6: Wipe Down the Area
Use a slightly damp microfiber cloth to wipe the coils, the surrounding frame, and the floor. This picks up the fine dust that brushing and vacuuming leave behind. Do not soak the coils or use wet cloths on them, since moisture near the compressor and electrical components is dangerous.
Also wipe down the base grille or kickplate before reattaching it. A clean grille allows better airflow.
Step 7: Reassemble and Plug It Back In
Snap or screw the base grille back into place, or push the refrigerator carefully back against the wall. Make sure the fridge is level and that there is at least an inch of clearance behind it for airflow. Plug the refrigerator back in or flip the breaker on.
Do not expect instant cold air. The compressor may run for a while as it adjusts, and it can take 12 to 24 hours for temperatures to fully stabilize after the unit has been off. This is completely normal.
One popular alternative method worth mentioning: some homeowners swear by using a leaf blower to blast dust off back-mounted coils. Several Reddit threads in r/Frugal and r/DIY report this takes only 5 to 10 minutes and clears dust the vacuum misses. If you try this, do it outside or in a garage, wear a mask, and point the airflow away from the compressor and fan.
What to Avoid When Cleaning Coils
Just as important as knowing what to do is knowing what not to do. A few common mistakes can damage your refrigerator and cost you far more than the time you saved.
Never use water or liquid cleaners on condenser coils. Moisture near the electrical components and compressor creates a serious risk of short circuits and corrosion. Stick to dry cleaning methods only.
Do not use a pressure washer, steam cleaner, or compressed air at close range. High-pressure air or water can bend the delicate aluminum fins on the coils, which permanently reduces their ability to dissipate heat.
Do not bend, tug, or cut the refrigerant lines. These copper tubes carry pressurized refrigerant, and puncturing one requires a professional repair that is expensive and messy. If a line looks damaged, stop and call an appliance technician.
Do not skip the unplug step, even if you are in a hurry. The fan blade near the compressor can startle you or injure your hand, and live electrical wiring sits in the same compartment.
FAQs
How often should I clean my fridge condenser coils?
Most households should clean refrigerator condenser coils every 6 months. If you have shedding pets, dusty living conditions, or a built-in luxury model like a Sub-Zero, clean them every 3 to 4 months. Homes with multiple pets may need cleaning every 2 months.
What happens if you don’t clean refrigerator coils?
Dirty coils act as insulation that traps heat, forcing the compressor to run longer and hotter. This raises your energy bills by up to 25 percent, causes inconsistent cooling, and can shorten the life of the compressor. In severe cases, clogged coils lead to premature refrigerator failure.
How do I know if my fridge coils are dirty?
Common signs include a fridge that runs constantly, warm exterior surfaces, rising electricity bills, food not staying cold enough, and a dusty or hot smell near the base. If you notice any of these, pull the fridge out and inspect the coils visually.
How long does it take for a refrigerator to cool after cleaning coils?
After cleaning and plugging the fridge back in, it typically takes 12 to 24 hours for temperatures to fully stabilize. The compressor may run continuously for the first several hours, which is normal. Do not adjust the thermostat setting during this recovery period.
Can you clean fridge condenser coils yourself?
Yes, cleaning condenser coils is a simple DIY task that takes 15 to 30 minutes. You only need a coil brush, a vacuum with attachments, and a cloth. The most important step is to unplug the refrigerator before starting for safety.
Where are refrigerator condenser coils located?
On most modern refrigerators, the coils are behind a removable base grille at the bottom front. On older models, they are mounted in a grid on the back of the unit. Some built-in models have coils behind a top grille. Check your owner’s manual to confirm.
Conclusion
Cleaning your refrigerator condenser coils is one of the highest-impact, lowest-effort maintenance tasks in your home. It takes under 30 minutes, costs almost nothing, and can cut your energy use while adding years to the life of your appliance. Now that you know how to clean refrigerator condenser coils and how often to do it, set a recurring reminder on your calendar today.
Whether you have a basic top-freezer unit or a built-in Sub-Zero, a twice-yearly cleaning keeps your fridge running efficiently through 2026 and beyond. Start with the 6-month baseline, adjust based on pets and dust, and listen to what your refrigerator is telling you.