
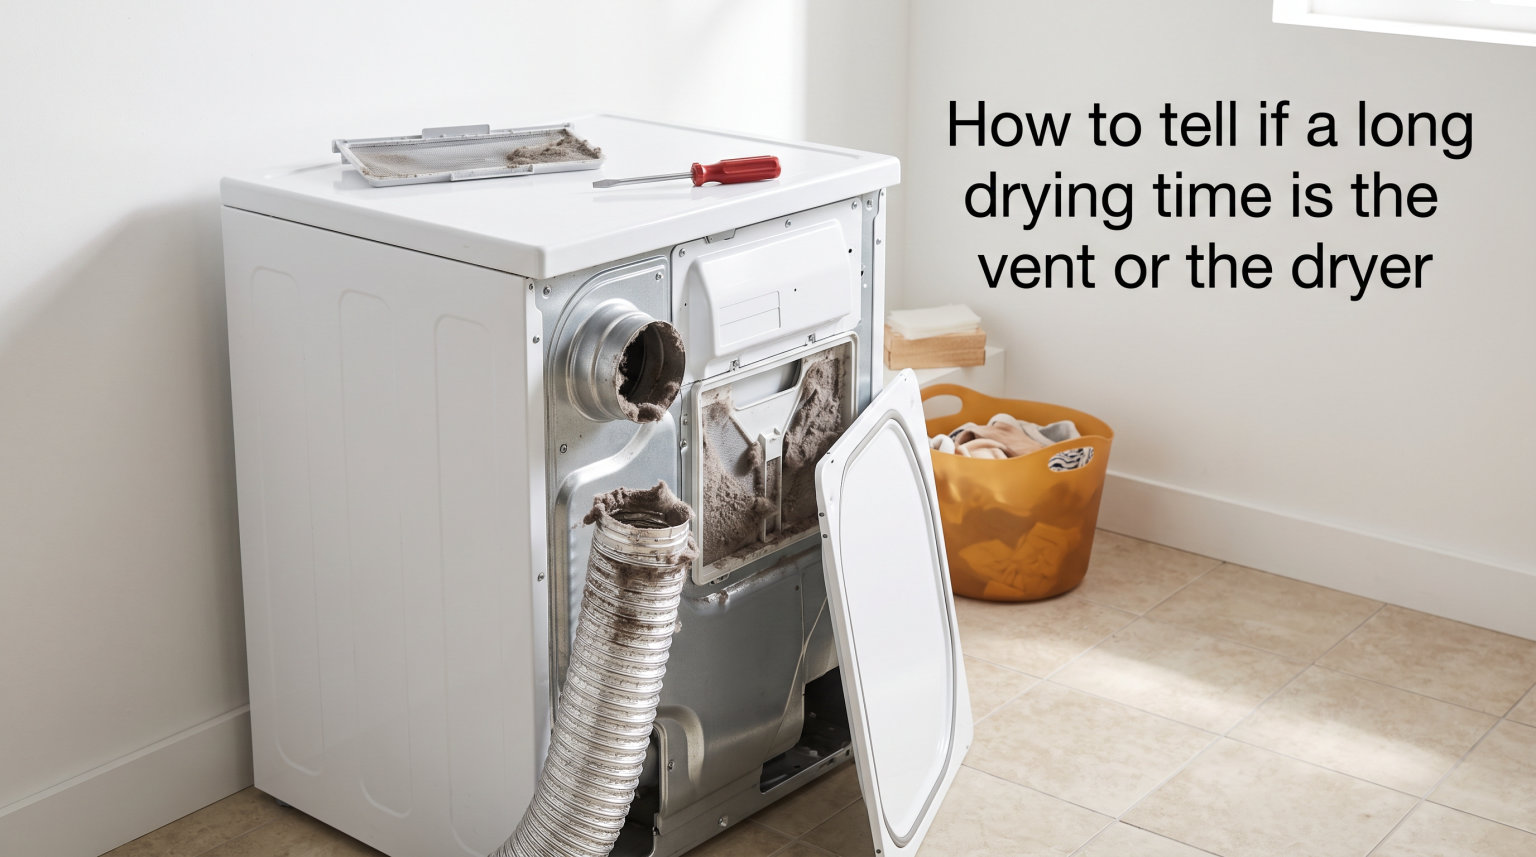
If your dryer has started taking two or three full cycles to dry a single load of laundry, you are not alone. It is one of the most common complaints homeowners have, and it wastes time, energy, and money with every extra run. The frustration of pulling out warm, damp clothes after an hour and a half is real.
Here is the good news. Learning how to tell if a long drying time is the vent or the dryer is something you can figure out yourself, without special tools or a service call. Roughly 80 percent of the time, the culprit is not the machine at all. It is restricted airflow somewhere in the vent system.
That distinction matters because vent problems are often cheap or free to fix, while dryer component failures usually require replacement parts. It also matters for safety, since a clogged vent is a leading cause of dryer fires. Misdiagnosing the issue means you might replace a heating element when the real fix was a $15 vent cleaning brush.
In this guide, our team walks you through a complete diagnostic process that starts with one simple test. That test resolves most cases in under a minute. From there, we break down every telltale sign of vent problems versus dryer problems so you know exactly where to focus your effort and your money.
Table of Contents
The Exterior Airflow Test: Do This First
The single most reliable way to tell whether your problem is the vent or the dryer is the exterior airflow test. It takes less than two minutes and requires no tools. Start by putting a load of wet clothes in the dryer and running it on a hot timed cycle.
While the dryer is running, walk outside and locate your exterior vent hood. This is the flap-covered opening on the outside wall where the exhaust exits your home. It is usually a few feet off the ground on the side or back of the house.
Place your hand about six inches from the vent opening. You should feel a strong, steady stream of warm air pushing the damper flap fully open. If the airflow is weak, the flap barely moves, or you feel almost nothing, your vent is restricted and that is almost certainly your problem.
Here is what the results tell you:
- Strong airflow, clothes still damp = your vent is clear and the problem is inside the dryer itself.
- Weak or no airflow = your vent is restricted and needs cleaning or repair.
- Air is strong but cold = the vent is fine but your dryer is not producing heat.
A healthy vent pushes air out with enough force to hold a piece of tissue paper against the opening. If the paper falls or barely flutters, airflow is too weak. This simple tissue test is something professional appliance technicians use on service calls.
This single check resolves more confusion than any other diagnostic step. Homeowners on appliance repair forums consistently report the same finding. As one Reddit user in r/appliancerepair puts it, long dry times are almost always an airflow problem, and the first thing to do is look outside where the vent hood is and make sure there are no obstructions.
Signs Your Long Drying Time Is Caused by the Vent
A restricted dryer vent chokes off the moist air that needs to leave the drum during a cycle. Without that escape path, humidity stays trapped inside and clothes remain damp no matter how hot the dryer gets. If your exterior airflow test came back weak, these symptoms will help you confirm the diagnosis.
Clothes Are Hot But Still Damp
This is the number one classic sign of a vent restriction. The dryer is producing plenty of heat, but the moisture has nowhere to go. If your clothes come out warm and wet rather than warm and dry, suspect a clogged vent before anything else.
The Laundry Room Feels Hot and Humid
When the vent is blocked, hot moist air backs up and seeps into your home instead of exhausting outside. If your laundry area feels steamy, muggy, or unusually warm while the dryer runs, that trapped exhaust is the reason. You might also notice condensation on nearby windows or walls.
The Dryer Shuts Off Mid-Cycle
Restricted airflow causes internal temperatures to climb rapidly. When that happens, the high-limit thermostat trips as a built-in safety measure, cutting power to prevent a fire. If your dryer stops before the cycle finishes and the top of the machine feels very hot to the touch, a clogged vent is the most likely trigger.
A Burning Smell During Operation
Lint that accumulates inside the vent duct can get hot enough to scorch. A musty, scorched, or burning odor while the dryer runs is a serious warning sign. Turn the dryer off immediately, unplug it, and inspect the vent before running another load. This smell means lint may be smoldering.
The Exterior Vent Hood Is Clogged or Damaged
Bird nests, insect hives, packed lint masses, and crushed duct sections can all block the exhaust exit from the outside. Check the exterior vent hood for visible debris, and make sure the damper flap moves freely when you push it with your fingers. A flap stuck closed by dirt, paint, or ice will block all airflow.
Common Causes of Vent Restrictions
Most vent blockages come from one of these sources:
- Lint accumulation inside the duct, especially at bends and elbows where air slows down
- A flexible plastic or foil duct that has been crushed or kinked behind the dryer
- A vent run that is too long or has too many sharp turns for the blower to push through
- Rodent or bird nests built inside the exterior hood or duct during colder months
- A vent hood damper stuck shut by accumulated dirt, debris, or ice
Flexible foil and plastic ducts are a common hidden problem that catches homeowners off guard. They sag over time, collect lint at every low point, and restrict airflow gradually until drying times double. Rigid metal ducting performs far better and is the type recommended by current fire safety standards.
Older homes present an additional challenge. Forum users frequently mention that houses built in the 1980s and 1990s often have longer, more convoluted vent routes that collect lint faster and are harder to clean thoroughly. If you live in an older home with a laundry room far from an exterior wall, vent maintenance should be a higher priority for you.
Signs Your Long Drying Time Is Caused by the Dryer
If the exterior airflow test showed strong airflow but clothes still come out damp, the problem lives inside the dryer. The machine is either not producing enough heat or not managing it correctly during the cycle. Here are the most common dryer-side causes and how to spot them.
Clothes Come Out Cool and Damp
When the dryer itself is failing to heat properly, clothes feel cool or lukewarm to the touch after a full cycle. This is distinctly different from the hot-but-damp symptom of a vent problem. If there is no heat at all, the heating element, igniter, or gas valve is the likely culprit.
Heating Element Failure on Electric Dryers
The heating element is the coiled wire that warms the air inside an electric dryer. Over years of use, the coil can crack, break, or burn through. When that happens, the dryer runs and the drum spins, but the air never gets hot. This is one of the most common electric dryer failures and typically requires replacing the element, a part that usually costs under $50.
The Thermal Fuse Has Blown
The thermal fuse is a one-time safety device that permanently cuts power to the heating circuit if the dryer overheats. A blown thermal fuse means the dryer will tumble but produce zero heat. Here is the catch that trips up many homeowners: a blown fuse is very often caused by a clogged vent in the first place. If you replace the fuse without fixing the vent restriction, the new fuse will blow again within weeks.
Faulty Cycling Thermostat or High-Limit Thermostat
The cycling thermostat regulates the target temperature inside the drum during normal operation. The high-limit thermostat acts as a backup safety switch that shuts everything down if temperatures reach a dangerous level. If either sensor fails, the dryer may not heat properly, may overheat and shut off early, or may run without ever reaching drying temperature.
Dirty or Failed Moisture Sensor
Most dryers manufactured in the last 15 years use two metal strips inside the drum to detect how damp the clothes are. When these strips get coated with a film of fabric softener residue and lint, the sensor falsely reads clothes as dry and ends the cycle early. The good news is this fix is free. Cleaning the sensor strips with rubbing alcohol on a cotton cloth often solves the problem immediately.
Worn Drum Seals
Drum seals are felt strips that create a tight gap between the rotating drum and the dryer body, keeping hot air directed through the clothes. When seals wear down, crack, or fall off, hot air escapes into the cabinet before it reaches your laundry. This reduces drying efficiency and is more common on machines over eight years old.
Gas Dryer Specific Issues
Gas dryers have additional components that can fail and they behave differently during diagnosis. The igniter, the flame sensor, and the gas valve solenoid coils all play a role in lighting and maintaining the burner flame. If the igniter glows bright orange but the burner never lights, the gas valve coils are the usual suspect and are a common failure point. Gas dryer diagnosis involves watching whether the burner ignites and then observing whether it cycles on and off properly during the run.
How to Tell If a Long Drying Time Is the Vent or the Dryer: Step-by-Step
Follow this troubleshooting sequence to narrow down the cause systematically. Each step builds on the previous one, so work through them in order and stop when you find your answer.
Step 1: Clean the Lint Screen Thoroughly
Start with the simplest possible fix. Remove the lint screen, scrape off all visible buildup with your fingers, and wash it under running water to remove the invisible film left by dryer sheets. Then use a long flexible lint brush to clean the housing slot below the screen, where lint packs down over months. This takes two minutes and resolves a surprising number of slow-drying cases on its own.
Step 2: Run the Exterior Airflow Check
Put a normal-size load of wet towels in the dryer and run it on a high-heat timed cycle for at least 15 minutes. Go outside and feel the air coming from the exterior vent hood. Strong warm airflow means the vent path is clear and you should move on to dryer-side checks. Weak airflow means the vent needs attention before you look at anything else.
Step 3: Disconnect and Inspect the Vent Hose
Pull the dryer forward away from the wall and disconnect the vent hose from the back of the machine. Shine a flashlight into the hose and check for lint clogs, crush points, tears, or disconnected sections. If you are still using a flexible white plastic or foil hose, plan to replace it with semi-rigid or rigid metal ductwork, which does not sag or crush.
Step 4: Run a Test Load With the Hose Disconnected
This is the definitive isolation test. With the vent hose still disconnected, start the dryer on a hot timed cycle with a small load of damp clothes. Hold your hand near the exhaust port on the back of the dryer where the hose normally connects.
If the air is hot and the clothes dry normally within a single cycle, your dryer is working perfectly and the problem is in the vent system. If the air from the back of the dryer is lukewarm or the clothes still come out damp even without the vent attached, the problem is inside the dryer itself.
This test is the single best way to separate vent from dryer issues because it removes the vent from the equation entirely. No guesswork required.
Step 5: Clean or Replace the Vent Duct
If the vent is the problem, clean the entire run from the dryer connection all the way to the exterior wall. You can use a dryer vent cleaning brush kit with flexible rods, or hire a professional service that uses compressed air or a rotary brush. Replace any sections of duct that are crushed, torn, or made of non-metal material.
Step 6: Test Dryer Components
If the isolation test pointed to the dryer, the most likely failed parts are the heating element, thermal fuse, cycling thermostat, or gas valve components. A multimeter set to the continuity setting can test each of these parts in minutes. You can find testing guides for your specific model by searching the model number online. If you are not comfortable working with electrical components or opening the dryer cabinet, this is the right time to call a technician.
Step 7: Know When to Call for Help
If you have completed the airflow test, cleaned the vent thoroughly, cleaned the moisture sensor, and the dryer still does not dry properly, a professional diagnosis makes sense. At that point the issue involves internal components that require disassembly, and continuing to guess can lead to buying parts you do not need.
How Long Should Your Dryer Vent Be?
Vent length matters more than most homeowners realize, and it is a factor no competitor explains clearly. A vent that runs too far or turns too many times creates natural resistance that causes lint buildup and weak airflow, even when nothing is technically clogged or broken.
The general rule from the International Residential Code is a maximum of 25 feet of straight rigid metal duct for a standard residential dryer. Every 90-degree bend reduces that maximum by 5 feet, and every 45-degree bend reduces it by 2.5 feet. So a vent path with two 90-degree elbows should be no longer than 15 feet of total duct.
To measure your vent run, trace the full path from the dryer connection to the exterior wall opening. Use a tape measure along each visible segment and add the lengths together. Count every sharp turn along the way. If your total effective length exceeds the limit, poor airflow is built into your setup, not caused by a clog.
For homes where the laundry room is too far from an exterior wall, a dryer vent booster fan can solve the problem. This is an inline fan installed in the duct that actively pushes air over long distances. Booster fans are common in condos, townhomes, and homes with interior laundry rooms.
Dryer Safety: Why This Matters Beyond Convenience
Restricted dryer vents are a leading cause of residential structure fires. According to data from the U.S. Fire Administration, clothes dryers cause thousands of home fires every year, and the majority of those fires trace directly back to a failure to clean the vent system.
Lint is extremely flammable material. When it accumulates inside a duct and the dryer heats the air passing through it, a single overheating event or electrical spark can ignite it. This is exactly why a burning smell from the dryer should be treated as an emergency, not an inconvenience to deal with later.
How often should you clean your dryer vent? Most manufacturers and fire safety organizations recommend a full professional vent cleaning once per year for a typical household. If you dry large loads daily, have a long vent run, or have pets that shed heavily, you may benefit from cleaning every six months instead.
Here is a seasonal maintenance routine that keeps your dryer running efficiently:
- Clean the lint screen after every single load, without exception
- Deep clean the lint trap housing monthly using a long flexible brush
- Inspect the exterior vent hood quarterly for nests, debris, and damage
- Schedule a full vent duct cleaning once per year
- Replace any flexible foil or plastic duct sections with rigid metal at the first opportunity
When to Call a Professional
Some problems are safe and practical to handle yourself. Vent cleaning, lint screen maintenance, and moisture sensor cleaning are all within reach for most homeowners and require minimal tools. But certain situations call for a professional.
Call a technician if you experience any of these situations:
- A burning smell that persists even after you have cleaned the vent
- The dryer trips its thermal fuse repeatedly, even after professional vent service
- Gas dryer burner problems, since gas components carry fire and carbon monoxide risks
- Internal component diagnosis that requires removing the dryer cabinet panels
Professional dryer vent cleaning typically runs between $100 and $175 depending on your location and the complexity of your vent run. That cost is a fraction of a dryer repair service call, and far less than replacing a dryer you did not actually need to replace.
If your dryer is more than 10 to 12 years old and needs a major component like a heating element or control board, weigh the repair cost against the price of a new energy-efficient model. Modern dryers with advanced moisture sensors and, in some cases, heat pump technology can cut drying time and energy use significantly compared to machines from a decade ago.
Frequently Asked Questions
How do I know if my dryer vent is restricted?
The fastest way to check is the exterior airflow test. Run your dryer on a hot cycle and go outside to the vent hood. Place your hand near the opening. If you feel weak or no airflow and the damper flap barely moves, your vent is restricted. Other signs include clothes that are hot but still damp, a hot and humid laundry room, and the dryer shutting off mid-cycle.
Why is my dryer taking 2 hours to dry clothes?
A dryer that takes two hours or more per load almost always has an airflow problem. The most common cause is a clogged or restricted dryer vent that traps moist air inside the drum. Other causes include a packed lint trap housing, a crushed vent hose, or a vent run that is too long. Less commonly, a failing heating element or blown thermal fuse can extend drying times.
Will a dryer dry if the vent is clogged?
A dryer will still run and produce heat with a clogged vent, but it will dry very poorly or not at all. The moist air has nowhere to escape, so humidity stays trapped in the drum and clothes remain damp. Running a dryer with a clogged vent is also a fire hazard, since trapped lint can overheat and ignite.
How do you tell how long your dryer vent is?
To measure your dryer vent run, trace the full path from the dryer connection to the exterior wall opening. Measure each visible segment of duct with a tape measure and add them together. Count every 90-degree turn along the way, since each one reduces the effective maximum length by 5 feet. A standard dryer vent should not exceed 25 feet of straight rigid duct, minus 5 feet for every elbow.
Conclusion
Figuring out how to tell if a long drying time is the vent or the dryer comes down to one simple starting point. Check the exterior airflow first, then run the dryer with the vent hose disconnected to isolate the machine from the ductwork completely.
If airflow is weak, your vent needs cleaning or repair. If airflow is strong but clothes stay damp, your dryer has a component problem. Either way, you now have a clear diagnostic path that saves you from guessing and from spending money on the wrong fix. Clean your vent annually, trust the isolation test, and call a professional when the problem goes beyond what basic maintenance can solve.