
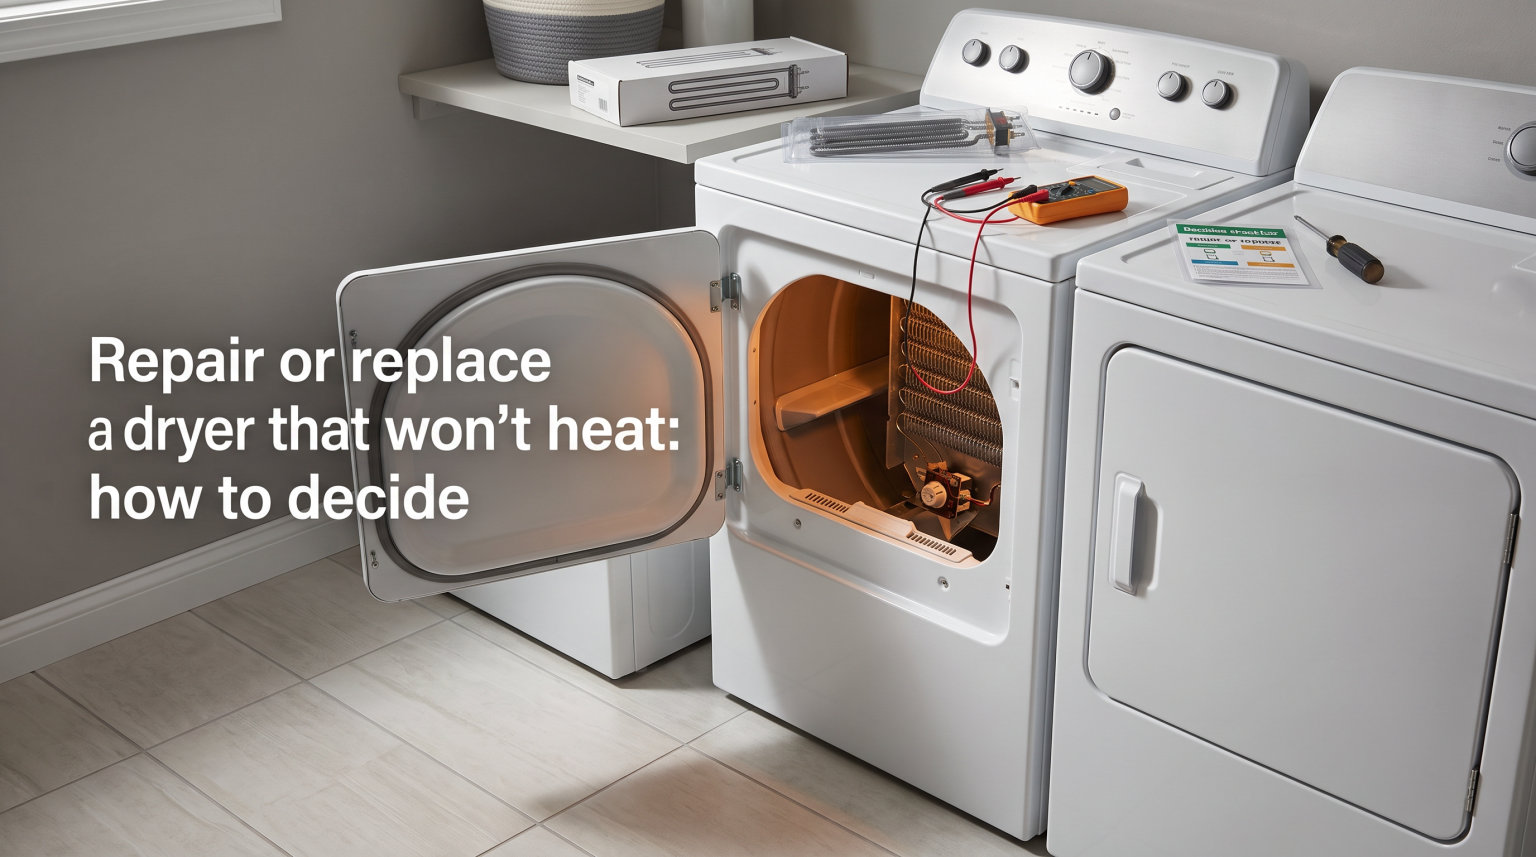
When your dryer stops heating, you’re facing a decision that hundreds of thousands of homeowners wrestle with every year. Should you repair or replace a dryer that won’t heat? The wrong call can cost you hundreds of dollars or leave you stranded with a dryer that breaks again in six months.
Our team has researched hundreds of repair cases, talked to appliance technicians, and analyzed repair-vs-replace data from Consumer Reports, MR Appliance, and Don’s Appliances to bring you a clear decision framework. In this guide, I’ll walk you through the exact process I use when helping friends decide what to do with a dead dryer.
By the end, you’ll know whether your dryer is worth fixing, what the repair should cost, and when replacement is the smarter financial move. The decision typically takes about 10 minutes once you have the numbers, and this guide gives you a framework that works for gas dryers, electric dryers, and every common brand. Let’s get into it.
Table of Contents
How to Know If Your Dryer Has a Heating Problem?
The most obvious sign is wet clothes after a full cycle. You pull out your laundry expecting warm, dry items, and everything feels damp or cold. Sometimes the drum tumbles normally, just without heat. Other times, the dryer won’t even start, and the timer seems to run forever without ever drying a single towel.
Here are the symptoms that confirm a heating issue rather than a different problem like a bad moisture sensor or control board:
Clothes still damp after a full cycle: The dryer runs for 60 minutes but the load feels cold or slightly warm at best.
Longer drying times than usual: A load that used to dry in 45 minutes now takes 90 minutes or more, even on high heat.
Dryer tumbles but produces no heat: The motor runs, the drum spins, but air comes out cold.
Overheating or burning smell: Clothes come out extremely hot or you smell a faint burning odor from the dryer.
Dryer stops mid-cycle: The thermal fuse may have tripped to prevent overheating, killing power to the heating circuit.
Visible lint buildup around the vent: Restricted airflow causes the heating element to overwork and eventually fail.
If you notice any of these, the heating system has a problem. The next step is figuring out whether the cause is simple (a clogged vent) or serious (a failed heating element or control board). Most homeowners can diagnose the issue themselves with a multimeter and 30 minutes of troubleshooting time.
Common Reasons a Dryer Won’t Heat
I’ve compiled the seven most common causes based on data from appliance repair services. Heating element failures and thermal fuse issues account for over 60% of all no-heat complaints, so start your investigation there. Electric dryers tend to fail in different ways than gas dryers, and I’ll cover both below.
1. Failed Heating Element
The heating element is a coiled wire that glows red-hot when electricity passes through it. Over time, the coil can break or burn out due to repeated heating cycles or restricted airflow that causes overheating. In an electric dryer, this is the #1 cause of no heat. Replacement costs around $30-$100 for the part, and most homeowners can DIY this repair in under an hour with a screwdriver, nut driver, and a multimeter.
You’ll usually find the heating element behind the back panel of the dryer on most models, though some front-loaders place it under the drum. Look for a coiled wire housed in a metal cage. If the coil looks broken or saggy, replacement is straightforward.
2. Blown Thermal Fuse
The thermal fuse is a one-time-use safety device that cuts power to the heating element when the dryer overheats. Once it blows, the dryer won’t heat at all even though everything else works fine. A thermal fuse costs $10-$25 and is one of the cheapest fixes available. However, you must also fix the underlying cause of overheating (usually a clogged vent) or the new fuse will blow within weeks.
Thermal fuses are designed to fail rather than allow the dryer to reach temperatures that could ignite lint or damage clothing. They are not reusable, and they should never be bypassed. If your thermal fuse keeps blowing, stop using the dryer until you find and fix the overheating cause.
3. Clogged Dryer Vent
Lint buildup in the exhaust vent restricts airflow, causing the dryer to overheat and triggering the thermal fuse. Cleaning the vent is free if you do it yourself and takes about 30 minutes. According to the U.S. Fire Administration, clogged dryer vents cause thousands of house fires every year, making this both a performance issue and a safety issue.
The vent runs from the back of the dryer to the outside of your house. Disconnect the dryer, pull the vent hose off, and inspect for lint accumulation. Use a vent cleaning brush or a shop vac to clear the entire run, including the exterior vent cover. Replace any plastic or foil vent hose with rigid metal ducting to reduce fire risk.
4. Faulty Thermostat or Thermistor
The thermostat regulates the dryer’s temperature by switching the heating element on and off. When it fails, the heating element may not receive the signal to turn on, or it may overheat the dryer to dangerous temperatures. A high-limit thermostat costs $20-$40 and can usually be tested with a multimeter for continuity at room temperature.
Most dryers have multiple thermostats: a cycling thermostat that controls normal temperature, and a high-limit thermostat that acts as a backup safety. If either fails, the dryer may not heat at all or may overheat badly. Always replace both if you’re diagnosing a temperature issue.
5. Tripped Circuit Breaker (Electric Dryers)
Electric dryers run on 240 volts across two circuit breakers. If one breaker trips, the dryer will run on 120 volts, which powers the motor and drum but not the heating element. You’ll see normal tumbling with cold air. Resetting the breaker costs nothing, but if it keeps tripping, you have a wiring issue or a short circuit that needs professional attention.
Electric dryer breakers are typically 30-amp double-pole breakers in your home’s main panel. If the breaker trips immediately after reset, unplug the dryer and call an electrician. There may be a short in the heating element or wiring harness.
6. Gas Valve Solenoid Failure (Gas Dryers)
Gas dryers use solenoid coils to open the gas valve when the control system calls for heat. When these fail, the dryer tumbles but produces no heat because no gas flows to the burner. This repair costs $100-$200 in parts and labor because gas work requires a qualified technician for safety reasons.
You can test the solenoids with a multimeter, but replacing them requires shutting off the gas line, disconnecting the gas valve assembly, and properly sealing all connections. Even a small gas leak can cause an explosion, so this is one repair where professional installation is worth the cost.
7. Broken Timer Motor or Control Board
The timer motor and electronic control board tell the heating element when to turn on and off. If either fails, the dryer may run indefinitely without heating or never advance to the heating cycle. Control board replacement runs $150-$400 and is usually not worth it on older dryers because of parts availability and labor costs.
Modern electronic dryers have control boards that fail more often than older mechanical timer models. If your dryer’s display is acting up, the controls are unresponsive, or the cycle seems confused, the board may be the culprit. Before replacing the board, check for stuck buttons, moisture damage, or loose wire connections.
Quick Troubleshooting Checklist: Try This First
Before you call a repair technician or shop for a new dryer, run through this checklist. You might fix the problem in under an hour for free, and you’ll have useful information for the technician if you end up calling one.
Step 1: Check the power source.
For electric dryers, make sure both legs of the 240V circuit are active. A tripped breaker stops heating but allows tumbling. Reset the breaker and test again. For gas dryers, confirm the gas valve is open and the supply line is not kinked or damaged.
Step 2: Clean the lint trap and vent.
Remove the lint screen and wash it with soap and warm water to remove fabric softener residue that blocks airflow. Disconnect the vent hose from the back of the dryer and vacuum out any lint. Run a vent cleaning brush through the exterior vent to the outside, and clear the exterior hood of any nests or debris.
Step 3: Test the thermal fuse.
Unplug the dryer and locate the thermal fuse (usually on the blower housing or heat element housing). Use a multimeter to check for continuity across the two terminals. No continuity means the fuse is blown and needs replacement. Replace it with the exact same temperature-rated fuse for your model.
Step 4: Inspect the heating element.
Remove the back panel and visually inspect the heating element coil. Look for breaks, burns, or sagging where the coil has separated. If the coil is intact, test it with a multimeter for continuity. Some heating elements have a built-in thermal fuse that you should test at the same time.
Step 5: Verify gas supply (gas dryers only).
Make sure the gas shutoff valve behind the dryer is fully open (handle parallel to the pipe). Listen for the click of the gas valve solenoids when the dryer starts. No click typically means a failed solenoid. You can also check the igniter glow through a small inspection hole in the burner assembly.
Step 6: Test the thermostats.
Each thermostat on the dryer should show continuity at room temperature when tested with a multimeter. No continuity means the thermostat has failed open and needs replacement. Be sure to test all thermostats, including the cycling thermostat and high-limit thermostat.
Step 7: Check the timer or control board.
For mechanical dryers, advance the timer manually through a full cycle to see if it engages the heating element. For electronic dryers, check for error codes in the display and look up the code in your owner’s manual or the manufacturer’s website.
If these steps don’t restore heat, the problem is likely deeper in the heating circuit, gas valve, or control board. That’s when you need to weigh repair against replacement.
Repair or Replace a Dryer That Won’t Heat: The Decision Framework
Three factors drive the decision to repair or replace a dryer that won’t heat: repair cost, dryer age, and repair history. The 50% rule ties these together into one easy-to-apply test that works regardless of brand or model. Most appliance professionals use this exact framework.
The 50% Rule Explained
The 50% rule is the industry-standard guideline used by Consumer Reports and most appliance technicians. Here’s how it works: if the estimated repair cost is more than 50% of the cost of a comparable new dryer, replace it instead of repairing. This rule accounts for the fact that older appliances often need additional repairs within a year or two, which would push the total cost of ownership above the replacement price.
For example, if a new equivalent dryer costs $800 and your repair quote is $450, you should replace. But if the repair is $350, fixing makes more sense because you’ll likely get more years of use before the next failure. The 50% rule isn’t perfect, but it gives you a defensible answer that matches what most professional repair services recommend.
Factor 1: Repair Cost
Get a written estimate before agreeing to any work. Simple repairs like a thermal fuse or heating element should run $150-$300 including labor. Complex repairs involving the motor, control board, or drum can exceed $400. Once a repair crosses $400, you’re typically in replacement territory unless the dryer is relatively new and in otherwise excellent condition.
Beware of technicians who quote high without diagnosing. A reputable technician will run basic tests and give you a breakdown of parts and labor separately. If the quote seems high, get a second opinion from another service provider in your area.
Factor 2: Dryer Age
The average dryer lasts 10-13 years according to industry data. If your dryer is under 8 years old, repair almost always makes sense. Between 8-12 years, the decision depends on the repair cost and overall condition. Past 12 years, parts become harder to find and frequent breakdowns signal end of life.
You can find your dryer’s age by checking the serial number tag, usually located inside the door frame or on the back panel. The serial number encodes the manufacture date in a manufacturer-specific format, so look up your brand’s serial number decoder online.
Factor 3: Repair History
One repair in the dryer’s life is normal. Two repairs in two years means components are wearing out. Three or more repairs signals that the dryer is approaching end of life, and a replacement will save you money within 18 months because parts keep failing across different systems.
Track your repair history even if it’s informal. Keep receipts, take photos of replaced parts, and note the date of each service call. When you’re weighing repair against replacement, this record gives you concrete data to support the decision rather than guessing.
Age-Based Decision Matrix for Dryer Replacement
Here’s the specific guidance I give people based on dryer age. Use this matrix along with the 50% rule for the clearest answer. Age alone isn’t enough to make the call, but combined with repair cost and history, it gets you to a definitive answer quickly.
Under 5 Years Old: Almost Always Repair
Most dryers under 5 years old are still under manufacturer warranty for major components like the motor and drum. Even out of warranty, replacement parts are readily available and the dryer has 70-80% of its useful life remaining. Repair unless the cost exceeds 75% of a new dryer’s price, which is rare for simple heating issues.
For dryers this new, focus on getting the right OEM replacement parts rather than cheaper aftermarket versions. The fit and longevity will be much better, and your repair will last as long as the rest of the appliance.
5-10 Years Old: Repair If Under 50% Rule
Dryers in this range are at the peak of their expected lifespan and often have years of reliable service left. Apply the 50% rule strictly: if the repair is under 50% of replacement cost, repair. If it’s over, replace. This range is where the decision genuinely depends on the specific situation.
If your dryer has been trouble-free except for this one issue, repair makes sense. If you’ve had other small problems (noisy drum, finicky controls), replacement may be the better move because more issues are likely ahead.
10-15 Years Old: Repair Only for Simple Fixes
Older dryers may have parts availability issues, especially for discontinued models from brands that have left the market. Repair only if the fix is simple (thermal fuse, belt, lint screen) and under $200. Complex repairs rarely pay off because other components will fail soon, and you’ll be back where you started within months.
For dryers in this age range, consider whether the energy savings of a new model would offset the repair cost. New ENERGY STAR dryers use 20-30% less energy than models from 15 years ago, which can save $30-$50 per year on your utility bill.
Over 15 Years Old: Replace
Beyond 15 years, replacement is almost always the better choice. New dryers are significantly more energy-efficient. A modern ENERGY STAR dryer uses about 20% less energy than models made before 2008, saving you $30-$50 per year on utilities and paying back part of the upgrade cost over the dryer’s lifetime.
Replacement also gives you access to features like moisture sensors, steam cycles, and smart connectivity that older dryers lack. If your dryer has lasted 15+ years, you’ve gotten excellent value from it, and a new model will likely run for another decade or more.
Cost Comparison: Common Repairs vs Replacement
Here’s what you can expect to pay for the most common dryer repairs. Use this table to compare against the cost of a new dryer when applying the 50% rule. Prices vary by region and brand, but these ranges reflect national averages from major repair services in 2026.
| Repair Type | Part Cost | DIY Total | Pro Labor | Pro Total |
|---|---|---|---|---|
| Thermal fuse replacement | $10-$25 | $15-$30 | $100-$150 | $125-$175 |
| Heating element (electric) | $30-$100 | $40-$110 | $150-$200 | $200-$300 |
| Drive belt | $15-$30 | $20-$40 | $100-$150 | $130-$180 |
| Thermostat/thermistor | $20-$40 | $25-$50 | $100-$150 | $130-$190 |
| Gas valve solenoid | $50-$100 | Not recommended | $150-$200 | $200-$300 |
| Drum motor | $100-$200 | $120-$220 | $200-$300 | $300-$500 |
| Control board | $150-$300 | Not recommended | $200-$250 | $400-$550 |
A typical mid-range new dryer costs $600-$900. So the 50% threshold is roughly $300-$450. Any single repair above that range on a dryer older than 8 years is a strong signal to replace. For dryers under 5 years old, you can extend the threshold to 75% of replacement cost because parts and warranty support are still strong.
Warning Signs Your Dryer Needs Replacement, Not Repair
Some issues go beyond a simple heating failure. These red flags mean your dryer is at end of life and replacement will save you money and headaches. If you spot any of these alongside the no-heat problem, lean toward buying a new unit.
Frequent Breakdowns
If you’ve repaired the dryer more than twice in the past three years, another fix is just a matter of time. The cost of those repairs adds up quickly, and you’ll likely face another within 12-18 months. Replace instead of chasing the next breakdown. The cumulative cost of repairs over three years often exceeds the price of a new dryer.
Strange Noises
Grinding, squealing, or thumping sounds usually indicate worn drum bearings, a bad motor, or a failing drive system. These repairs often run $300-$500 and signal that the dryer is wearing out across multiple components. If you’re already facing a heating repair and adding a drum repair, replacement is almost always cheaper.
Burning Smell or Smoke
A burning smell that isn’t resolved by cleaning the lint trap and vent indicates an electrical short or motor failure. This is both a repair trigger and a safety hazard. Don’t continue using the dryer until the cause is found. Persistent burning smells often point to failing insulation around the heating element or motor windings, which can lead to fire.
Visible Rust or Damage
Rust on the drum, cabinet, or internal components means moisture has compromised the metal. Repairs are temporary at this point because corrosion spreads to other parts. Once you see rust inside the dryer, expect more problems within a year as other components fail.
Outdated Features
If your dryer lacks moisture sensors, multiple heat settings, or energy-efficient cycles, you’ll save money on utilities by upgrading. Modern ENERGY STAR dryers use 20-30% less energy than models from the early 2000s, and they typically include features like wrinkle prevention, sanitize cycles, and steam refresh that older dryers don’t have.
Parts Are Hard to Find
Discontinued dryers often have limited or expensive parts availability. When a simple thermal fuse costs $50 because it’s a rare part, repair economics shift toward replacement. Check parts availability for your model before agreeing to a repair, because delays of weeks for parts make the situation worse.
DIY Repair vs Hiring a Professional: What to Consider
Some dryer repairs are safe and easy for homeowners with basic tools. Others require a qualified technician for safety and quality reasons. Knowing the difference can save you hundreds of dollars or prevent a dangerous mistake.
DIY-Friendly Repairs
These repairs are safe for most homeowners and require only basic tools like a screwdriver, multimeter, and putty knife:
Thermal fuse replacement
Heating element replacement (electric dryers)
Drive belt replacement
Lint trap cleaning and vent clearing
Thermostat replacement (with electrical experience)
Before starting any DIY repair, watch a video specific to your dryer model and unplug the appliance. Most repairs take 30-90 minutes and require only basic hand tools. If you get stuck or confused, stop and call a professional rather than forcing parts.
Call a Professional
These repairs involve gas lines, complex electronics, or sealed systems. DIY mistakes can cause fires, gas leaks, or electrocution:
Gas valve replacement
Control board replacement
Motor replacement
Drum bearing replacement
Any repair involving the gas line
Professional labor typically runs $100-$200 per visit, with most repairs completed in 1-2 hours. Get at least two quotes to compare pricing in your area, and ask whether the technician offers a warranty on parts and labor. A 30-90 day warranty on the repair is standard.
Safety Considerations When Troubleshooting a Dryer
Always disconnect power before opening the dryer cabinet. Unplug electric dryers and shut off the gas valve for gas dryers. Even unplugged appliances can hold a charge in capacitors, so avoid touching control boards unless you’re trained to discharge them safely.
For gas dryers, any work on the gas line should be done by a licensed technician. Even a small gas leak can cause an explosion or carbon monoxide poisoning. If you smell gas at any point during troubleshooting, leave the house and call your gas utility immediately. Do not operate light switches, phones, or anything that could create a spark.
Never bypass safety devices like the thermal fuse to keep the dryer running. These components exist to prevent fires. If the fuse keeps blowing, the cause (usually restricted airflow) needs to be fixed, not worked around. A dryer that runs without thermal protection can overheat enough to ignite lint and start a house fire within minutes.
Frequently Asked Questions About Dryer Repair and Replacement
Is it worth fixing a dryer that doesn’t heat?
Yes, if the repair costs less than 50% of a new dryer’s price and the dryer is under 10 years old. Common no-heat repairs like thermal fuses and heating elements typically cost $150-$300, which is worth it for most dryers.
What is the most common cause of a dryer not heating?
The most common causes are a failed heating element (electric dryers) and a blown thermal fuse. Together these account for over 60% of no-heat dryer issues. Restricted airflow from a clogged vent is often the underlying cause of a blown thermal fuse.
How much does it cost to fix a dryer that won’t heat?
Most no-heat repairs cost $150-$300 when done professionally, including parts and labor. Simple fixes like thermal fuses run $125-$175, while heating element replacements run $200-$300. Complex repairs involving control boards or motors can exceed $400.
What is the average lifespan of a dryer?
The average dryer lasts 10-13 years. Gas dryers typically last slightly longer than electric dryers because they generate less internal heat. Regular maintenance like cleaning the lint trap and vent extends dryer life by 2-3 years.
What is the 50% rule for appliance repair?
The 50% rule states that if a repair costs more than 50% of the replacement cost, you should replace the appliance instead. For a dryer that won’t heat, if the repair estimate exceeds 50% of a comparable new dryer’s price and the unit is over 8 years old, replacement is the better financial choice.
How do I know if my dryer’s heating element is bad?
Test the heating element with a multimeter for continuity after disconnecting power. No continuity means the element is broken. You can also visually inspect the coil for breaks or burn marks. A bad heating element typically causes the dryer to run normally without producing any heat.
Can I replace a thermal fuse myself?
Yes, thermal fuse replacement is one of the safest DIY dryer repairs. The part costs $10-$25 and installation takes 15-30 minutes with basic tools. However, you must also clean the dryer vent thoroughly or the new fuse will blow from the same overheating cause.
Final Thoughts on Repairing or Replacing Your Dryer
Whether you repair or replace a dryer that won’t heat comes down to three numbers: the repair cost, the dryer’s age, and its repair history. Run through the 50% rule, check your dryer’s age against the matrix above, and consider how often you’ve repaired it in recent years. These three factors together give you a clear answer in most cases.
If you’re leaning toward repair, start with the troubleshooting checklist. You might fix a clogged vent or replace a thermal fuse for under $30 and avoid a service call entirely. If you’re leaning toward replacement, focus on ENERGY STAR certified models that will pay back the upgrade through lower utility bills over the next decade. Either way, you’ll know you made the call with the right information.